Feeds:
Posts
Comments

Archive for April, 2013

Hard upon the (late) April repost of monthly planning from Jen at Unearthing This Life, here’s what to do in May (a day early)! My May will be taken up with continuing rehabbing (ish) of my house, and of course, getting the garden up and running.

Gardening:

  • Skip trimming shrubbery if you notice any nesting. Let those birds have some solitude!
  • Plant annuals if you’re safe from frosts and trim back perennials if needed in warmer zones.
  • Zone 4 and lower transplant tomatoes, peppers, cucurbits and other warm weather crops. Zone 5 and up– not til the end of the month!
  • Tidy up bulb foliage if it begins to die back.
  • Allow columbine and foxgloves to go to seed and collect some for next year.
  • Trim back blooms on roses and day lilies to promote re-blooming.
  • Keep shears and trimmers clean and available for deadheading and pruning.

Outdoors/Yard:

  • Set up and clean bird baths.
  • Clean Patio Furniture.
  • Clean grill.
  • Repair/purchase water hoses and fixtures. If appropriate, make sure water barrel systems are in good repair and have no algae buildup.
  • Make sure gutters are draining properly by watching them during a heavy rain. If there’s any overflow or tipping, you may need to have them cleaned or repaired.
  • If needed, have your air conditioner checked. Clean any debris and trim back plants to allow maximum airflow.
  • Start clearing paths to wild berries and keep them accessable until harvests are done.

Animals:

  • Consider weaning goats and sheep if necessary.
  • It may not be to late to purchase chicks and other fowl from your local farmers co-op.
  • Watch for hummingbirds to return. Be prepared with clean feeders and simple syrup (four parts water to one part sugar).
  • Bees – make sure you can locate queens and that they are laying. Check for foul brood, varroa mites, and hive beetles. Is your honey coming in yet? Do you need to feed your bees? Watch for swarming.
  • Look into stocking your ponds with fish now that the cold weather is gone.

Indoors:

  • Change air filters and adjust thermostat a few degrees to save on electricity.
  • Clean ceiling fan blades and shades.
  • Invest in a good window/box fan.
  • Get your furnace and water heater serviced
  • If you don’t already have one, prepare an emergency kit with 3 days worth of supplies and locate your safe place for severe weather.
  • Locate and organize your picnic gear – get out there and enjoy the beautiful Spring weather at a moment’s notice!

*****

What projects do you have lined up for this month?

Read Full Post »

Every spring, for the past five years, I am amazed at the mounds of fire ants that develop in our yard and garden areas. Almost overnight (not really) it just suddenly seems like they are everywhere.

I definitely have a love-hate relationship with fire ants (also known as red imported fire ants – solenopsis invicta). Love and hate are both pretty strong words to associate with fire ants, maybe it should be more “like” and “dislike.”
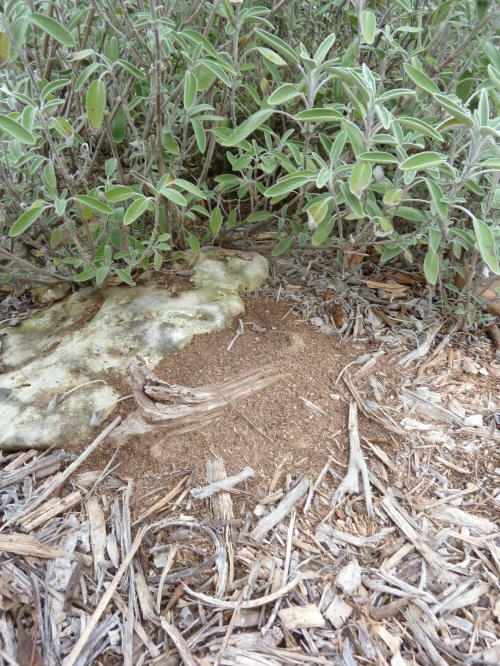
Fire ants 1

It is hard to have any nice and tender thoughts about fire ants when a few of them have attached themselves to your ankle or leg, and are stinging away. The fiery pain from the sting is finally reaching your brain and you are swiping them off you.  As you hop around, stamping your feet, chances are a few not so pretty words might escape from your lips.

In reality the fire ant bite isn’t what causes the pain, they bite you in order to hang on and get a good grip so they can insert their stinger and get the venom in you…. that is when you start feeling the fire. Unlike the honey bee, the fire ant can sting you repeatedly and then get back to what ever it was they were doing.

Fire ants 2I will admit that I have taken great pleasure in wiping out mound after mound of fire ants using a locally made organic product called Anti Fuego that is made by Gardenville. The product is a concentrated mixture of things like molasses and orange oil (and a few other things) and it is designed to drench and conditions mounds and soils….. but it’s main purpose, for me, is to kill fire ants. After all, who wants fire ants around?

Well, I am going to ask you to have an open mind here. If we wipe out all the “bad” insects and bugs there will be nothing for the good guys to eat thus creating an unequal balance in the greater scope of things. I have understood that principle for many years, but fire ants? Come on! Really?

Yes, fire ants do have a purpose in life. That is really hard believe when you are being stung!

So, why would anyone want to keep them around? Fire ants voraciously consume populations of fleas, ticks, termites, cockroaches, chinch bugs, mosquito eggs and larva, scorpions, etc. That seems enough to persuade me to keep them around (within reason!)

I try to peacefully co-exist with them, and that isn’t always easy, but it is worth it for the good work that they do. I will let them do their work as long as they don’t take up residence in the walkways through the yard or in the gardens. It is an ongoing battle. This plan works for us , but that doesn’t mean it will work for others. Fire ants cause severe damage to cattle and wild life, and their mounds can cause terrible damage to farm equipment.

Fire ants 3In our yard, a few of the places that the fire ants love to take up residence are in my piles of composted horse manure, dirt/compost piles and under anything that lies on the ground (like a floor mat, garbage can, piece of plywood.) When I am loading my wheelbarrow with manure to take to the garden, I am very aware. When I go to the ranch to pick up piles of manure, I am even more aware. It is really no fun to be an hour from home, standing in a mound of fire ants while loading my truck with manure and have no way to treat the stings.

When a fire ant stings you, you will feel immediate sharp pain that just seems to continue to burn and eventually will start to itch. Within 24 hours a raised white pustule forms and remains for several days. This isn’t an infection, but if you break it open you are increasing your chances of that area becoming infected (fun stuff huh!) People with diabetes or compromised immune systems have the potential for other problems, especially if they have been stung numerous times. While a few strings do not usually constitute a major medical emergency, there is a small percentage of people that develop allergic reactions to fire ant venom. These vary in intensity, but in the most extreme cases even a few stings can result in the life-threatening condition known as anaphylaxis.

Fire ants 4

I manage to get stung several times a year, usually around 3-7 stings at a time. They are always on my ankles and hands/wrists and are just plain bothersome. For me it is the sting and itch that feels OH SO GOOD when you itch it, but you never get any relief from itching it, just more sting and itch. I have tired several home remedies like baking soda paste, meat tenderizer and clear nail polish with no results of relief what so ever. So far, the only remedy that I have found that gives me any relief at all is Vick Vapor-rub! When I head out to pick up a load of manure or dirt I always make sure I have a jar of Vicks with me. I have the best results if I can get the Vicks on the sting locations immediately; if I wait just 5 minutes I will develop the red swelling bump, pain and itching, granted it is much less that it would be without applying the Vicks. In the photo above, I was stung 2-3 times and there is hardly a mark left because I applied the Vicks immediately!

I would like to work on making my own vapo-rub. Vicks active ingredients are camphor, eucalyptus and menthol and as I think about making my own fire-ant relieving variation, I think about rosemary, thyme and eucalyptus essential oils as a possible combination, maybe even some tea tree.

I don’t see fire ants moving out of our area any time in the near or distant future, so I will try to co-exist semi-peacefully with them and keep a jar of Vicks on hand until I can make up some of my own variation.

Do you have any secrets for dealing with fire ants in your area?

Sincerely, Emily

You can see what else I am up to over at Sincerely, Emily. The topics are varied, as I jump around from gardening to sewing to making bread or lotion and many things in between.

Read Full Post »

This spring has brought me so many new projects that I often get overwhelmed when choosing what to write about. I figured this morning I would share with you what I have planned for today.

Sometime back toward the beginning of the year, I was lucky enough to be shipped some plant material from a few very old varieties of currant bush (some of which are very rare). I received three varieties of white currant (White Versailles, White Dutch and White Imperial), and one pink currant (Gloire des Sablons). I had never rooted currants before, though I had attempted (and then forgotten about and killed) some gooseberries before, but these were so special to me that I became intensely vigilant about their care.

This week it has finally become time to pot them up and I have to admit that I look on them adoringly and get a little giggly-excited when I talk about them to people. They’re like my little babies! They went from dead-looking little twigs to well-rooted, sturdy young plants.

Have you ever rooted anything from the ribes family? It’s really very easy. They naturally root from their little buds (okay, I know the technical term for those buds is in my brain somewhere, but I’m totally blanking!) and will even produce additional roots when layered in the garden.

Basically, all you need for rooting cuttings of ribes is dormant plant material (if you live in the north, there may still be time to get some of this) and a lightweight soil that retains moisture, but also allows for drainage. I just used a peat and perlite based potting soil. You can add a rooting hormone if you really want to cover your bases, but I got wonderful results from just the twigs-in-dirt method.

There are several ways to do this, but this is what I used and I had a 96.9% success rate (yay math! That’s 31 out of 32 cuttings that rooted successfully!)

Clip your plant material into short stems, allowing 5-6 buds (nodes? is the word nodes?) per piece and leaving one healthy-looking node right near the base of the cutting.

Fill your containers with your soil. Some people do this in straight perlite, some in straight peat… I think this mix contains peat, compost, sand and perlite. It’s just the big bag of custom potting mix that my local mom-and-pop nursery sells. I kind of thought the peat would make it ever so slightly acidic, which is generally the preferred soil of currants.

Poke a hole in your moistened soil with a pen or stick or finger or something, but don’t use your cutting to do so; it could damage the nodes (I sure hope I have this word right). After poking the hole, insert the cutting so that only 2-3 nodes are showing above the soil. You don’t want to get too ambitious; the more nodes above the soil, the more stress the plant will have to endure in order to create leaves from those nodes, and the more work the new little baby-roots have to do, absorbing nutrients.

Try to back-fill your hole by inserting a pen/stick/finger into the soil elsewhere in the pot and maneuvering it so that the hole fills from the bottom first. This ensures that you won’t have a huge air gap in the soil around the plant material (like a mini dibbler). Also, make sure the soil is not compacted from doing this. It should be light and fluffy (think freshly sifted flour).

I opted to water mine from the bottom, so that there was always water available, but I also used one of those drainage inserts in the bottom of my tray. Most things that you read tell you to put a plastic bag over the cuttings, but it seemed like when I had the plastic bag on them the first two days I kept bumping it and disturbing the plant material, which I can only imagine didn’t help them form new roots. I eventually pulled the plastic and tried misting them once a day (or once every other day) until they began to form leaves.

The biggest thing with rooting cuttings is patience. You want to make sure you have roots forming, but to check by disturbing the cutting can be perilous for those new wittle baby roots. I simply waited and waited until I saw a sneaky little root poking out of one of the holes in the bottoms of the pots. The one cutting that I did disturb in an early attempt to check for roots is the only cutting that didn’t make it. Coincidence? Possibly.

So yesterday I ventured out and purchased a new stack of terra cotta pots, and today I will be introducing my little baby currant bushes to their new more spacious living quarters. Hopefully they’ll continue to grow and thrive and next year I can post about how wonderful it is to taste a currant that was first bred in the 17th century!

Have you started anything from cuttings for this season?

Read Full Post »

I do a lot of garden planning.

One of my main gigs is as a member of the leadership team at Peterson Garden Project, where we have 6 small to large community gardens. There’s micro and macro planning to do– from helping new gardeners plan a 4×8′ plot to helping our team lay out 200 plots, to planning what to grow for donations to nutrition programs and food pantries (5% of every garden is set aside for community growing and donated to various programs).

This year we’re also planning to install a seed saving garden at our flagship site; our partners on the site have already put in bee hives.

CLESE gardenerOur partners are an urban farm that has been built to help refugees from Bhutan and Burma achieve financial stability. These traditional farmers grow for themselves and for commercial sales. Beekeeping is a traditional skill for the Bhutanese farmers at Global Gardens, but will be new for those from Burma. Both groups are eager to learn how to raise bees in the United States so they can provide honey for their families and earn needed income by selling honey and beeswax products. Bees will also make Global Gardens more productive by pollinating our vegetable crops.Global Gardens farmers learn about farm and small business management so they will be able to operate their own enterprises – perhaps including a few new apiaries for Chicago.

Our seed saving garden will be a traditional row garden forming the boundary between the community garden and the farmers; another portion may form a living backdrop for a stage in the community area. All seeds will be provided by the world famous Seed Savers Exchange, and will include seeds from the private collection that are not available commercially. Seeds will be preserved and shared with other seed savers in the Chicago area. The project will include an army of volunteers to care for and learn about the plants (if you’re in Chicago you could be one of them), educational classes, and events to teach people about food heritage and seed saving.

We have a Kickstarter to help fund it, and we’re very proud that we’ve met our goal (but there’s nothing stopping us from going over it!). Watch the Peterson Garden Project Facebook page for updates. If you choose to make a pledge, post in the comments; there’s a special extra incentive just for NDiN readers– seeds if I have to mail to you, or a seedling if you’re in Chicago and can pick it up.

Let us know about your own adventures with bees and seeds!

Read Full Post »

Spring has arrived in some parts of the US while other parts are still, not-so patiently waiting. Last week we had fun looking back at what we harvested last year. This week we are looking forward and sharing our garden plans.

***

Oh, I  (Sincerely, Emily) always seem to have a lot of plans, but as you know, there was a big wrench put in my plans so far this year. My friends have planted peppers and tomatoes for me and I will get the okra seed in the ground in the next week. That is about it for my garden plans. If things had gone according to “plan” I would be adding tomatillos to my garden this year. I have wanted to plant them for the past few years, but it just didn’t happen. That plan will wait until Spring 2014.  Right now I have peppers and tomatoes already forming.  I am glad to have things growing out there.

Cubanella pepper 4-19-2013

Cubanella pepper 4-19-2013

***

Tanglewood Farm is always abuzz with plans; some come to fruition, some shrivel up and die like a cast bug. Heh.

So far this year my biggest plans have been to try to pick up where I left off last spring. The weather last year was so atrocious that I admit I threw in the towel early. Okay, I planted a lots of things, and I admit I got to harvest a handful of tomatoes and some greens, but it was just such a bummer, especially after I had ordered and planted (and paid for) 80+ new berry bushes, including raspberries, dewberries, blackberries and gooseberries. By the end of the summer, regardless of watering, everything was crisp and brown to the roots.

So this year I have reordered most of the plants that died last year and I am starting afresh! I am also putting a lot of the young (wimpy) bareroot plants that I’ve ordered in pots until they are a little more established and until the ground is a little more planting-friendly. Right now we are soggy and sloshy from the house gardens to the back orchard (which, actually, is currently two feet under water!) so planting will have to wait, but planning… planning is always going on here at the farm!

***

It’s killing me, but I think this year is probably a no-corn year.  I’m working on my rotation, and finding that without corn I have almost too much space, which I think will be filled with beans– boring, but practical (all the practical stuff is boring). Follow my gardening fits and starts at MyFolia.com/gardener/Xan!

Seedlings Rainbow Chard Seedlings Aunt Ruby

***

Are you planting something new this spring?

Read Full Post »

This year Spring has actually come on quite slowly for once down herein South Texas. Although our temperatures are all over the board, it has been nice. A few days ago we were 90F, while today we struggled to hit 70F. (Sorry, I know many of you in the Midwest are digging out from the latest snow fall or trying to stay upright on icy sidewalks!)

With days that have already been in the high 80’s and up to 90F, I notice “Cat Tummy Season” is already here.  What the heck is “Cat Tummy Season?”

Kivuli tummy

I think that explains it.

Kivuli tummy 2

Sincerely, Emily

You can see what else I am up to over at Sincerely, Emily. The topics are varied, as I jump around from gardening to sewing to making bread or lotion and many things in between.

Read Full Post »

Well, Tanglewood is aflutter with spring activities here in Michigan (though I hear we may get another bit of snow next week – at least it’ll kill the first mosquito swarms!)

In addition to our foster bottle lamb, new gardens and deck/planters, and looming bareroot orders and sheep fencing, we’ve just added six fluffy little peepers to our farm.

Say “Hi” to our new khaki Campbell ducklings!

It’s been a few years since we’ve had ducklings. I forgot they start off so small! Since we lost almost our entire flock of ducks to accidental-neighborial-poisoning last year and the only female left was kind of… neurologically strange afterwards, we decided to bring in some new genetics by ordering our ducklings from the local feed mill.

Of course after they arrived the first order of business was to snuggle them all, one-by-one.
(pictured: my main squeeze feat. duckling)

We decided to stick to khaki Campbells because they’re leaner and more upright than a lot of farm-ducks, so they produce finer meat, lighter-textured eggs and they’re better at mosquito and fly control because they’re more mobile than the more horizontally built farm ducks. My experience with Campbells has been great, though they do seem to be a bit more aggressive than other duck breeds. They’re easy to herd and they’re intelligent; they can even fly considerable distances, which means they are better at evading predators. Someone mentioned to me recently that they thought Campbells were produced by crossing back to wild mallards, rather than domestic mallards, and that might be why they are slightly smaller and more efficient than a lot of other modern farm duck breeds.

We are considering adding a couple of buff ducks, or maybe a Cayuga at some point, but who could resist these little peepers?

Are you adding to your “flock” this spring?

Read Full Post »

Our wonderful Jen at Unearthing This Life has been posting these great month-by-month planners for a few years. Just because she’s not writing here anymore doesn’t mean we stop the reposts!

I’ve been pretty productive this April– completely reconfigured the usage of my house to reflect the new reality of being in it alone. Lots of painting, moving and patching. The garden’s been a bit neglected through all this, but I’m hoping to get back on track. You can follow my garden progress at MyFolia.com/gardeners/Xan.

Here’s Jen’s April planner:

Gardening:

  • Tilling garden beds where necessary to work in compost and get rid of weed seedlings
  • Edging beds or digging the last of the new beds
  • Add supports to garden beds for plants like tomatoes, peas, gourds, roses, peonies, and beans.
  • Sowing outdoor hardy annuals
  • Sow last of the peas, potatoes, and onions. Continue starting beets, lettuces, cabbages, radishes, and carrots.
  • Planting rooted raspberry canes and strawberries
  • Hardening off and planting of vegetable seedlings
  • Plant any remaining saplings and transplants
  • Rake around fruit trees to help with invasive bugs and/or treat for them. Use treatments only after flowers are gone.
  • Questions about what to plant when? Go to Mother Earth News!

Outdoor house and yard Chores:

  • Clean up fallen branches and sticks, nuts, and leaves.
  • Hang bird/butterfly/bat-houses. If you’re not a beekeeper consider hanging a mason bee box. Set up bird baths and drinking holes for beneficial critters like bees.
  • Tidy up gutters and look for winter damage.
  • Bring out water hoses and setting up water barrels.
  • Repair screens check caulking/insulation around windows and repair if necessary.
  • MORELS!

Animals:

  • Purchase/raise chicks
  • Consider any expansions and rotations for this seasons’ critters.
  • Repair fencing.
  • Add supers to beehives. Check brood.

Indoors:

  • Wash windows and curtains.
  • Organize and collect glass canning jars.
  • Clean out freezers and storage for this year’s crops.
  • Plan simple, yet filling meals for lots of energy.

What will you be working on this month?

Read Full Post »
As we get ready for the new growing season, it’s fun to look back at what you grew last year!

***

Probably my (Alexandra) last year in my big garden has me thinking about what I’ll want to grow that I really use. Tomatoes, of course, but what about carrots (cheap to buy) and tomatillos (also have way more than I need).8106641743_5e02871e68_z 8106657772_7bb09e2bf8_z

***

I (Chiot’s Run) was just thinking about this yesterday as well, looking through my old photos of delicious vegetables, dreaming of the wonderful bounty my larger gardens will produce this year. Here were some of my favorites from last year:
last year harvests 1
last year harvests 2
last year harvests 3

***

I (Sincerely, Emily) loved all the peppers that came from last years garden, but there was one particular vegetable that  I was the most thrilled about growing last year. The allusive zucchini (courgette.) For several years I had tried and tried, and struggled and struggled to grow zucchini. Last year was a HUGE success.

Look! Zucchini***

What did you grow last year?

Read Full Post »

With my outdoor and active life still “on hold” I am finding all sorts of different things to do. The other day I was paging through some photo albums and found some older photos in them that were fun to see.

I grew up with cats and so did my dad. One of the photos I found was of my dad in one of his cars. What I didn’t notice until later was there is a cat in the car with him. I believe the photo is from the 50’s, the car is much older than that, but I have no idea what kind of car it is or the year.

072

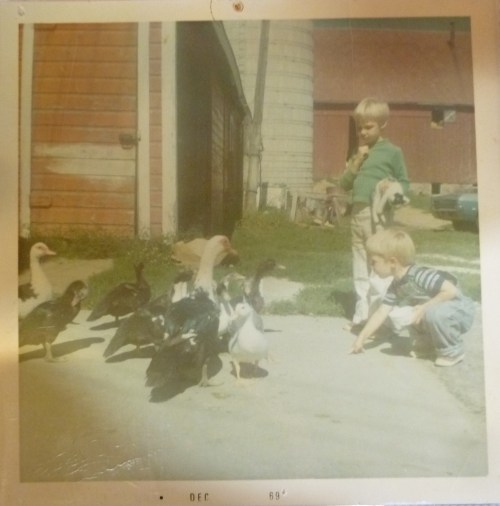
This photo is one of my all-time favorites. I was almost 5 years old in the photo.

041

I’m having fun looking through the old photos. I’m also glad that I can take a digital photo of them to share with family and preserve them for generations to come.

You can see a few other old photos that I posted back in November here.

Are you preserving some of your old photos? How are you doing it?

Sincerely, Emily

Read Full Post »

Older Posts »