Feeds:
Posts
Comments

Archive for the ‘Handmade’ Category

It seems that my list of bookmarks on my computer just keeps getting longer and longer, and I just keep adding to it. The bookmarked things ranges for herb websites to blogs of all sorts, recipes and crafty things I would like to try. (ya, I have heard of pinterest, and I should probably use it more, but it seems I get lost in time when ever I log in there)

Every time I bookmark something it ends up at the bottom, and the bottom seems to be pages and pages down there, so I started working on organizing the bookmarks and as I did that I came across things I had forgotten about (what a concept!)… so I decided to try to either do something, like a craft, each week or try a recipe or read a certain blog I bookmarked but never got back to.

I have a lot going on right now, so I picked a few simple things that wouldn’t take up too much time. I started with a bookmark. I figured it would be perfect for my niece that had a birthday this week. This was a super frugal gift, because I used some of those left-over scraps of paper that I save. I found the original on The Girl Creative.Book marks 1I tweaked the pattern for me and simplified it. The original bookmarks are cute, but my niece is 11, and I wanted something a bit more tailored for her.Book marks 3I picked out some designer card stock/scrap-booking papers that I thought that she would like (blues and greens) and made a few. Another niece likes hot pink and animal prints, so I made a few for her at the same time.Book marks 5This was a quick and easy project for me to do and it felt good actually getting around to one of those things I had bookmarked off the internet.

Do you have a long list of bookmarked things? How do you organize them?

Do you ever have things you want to try? Do you ever get around to them?

Sincerely, Emily

Read Full Post »

Two of my nieces have sinks in their bedrooms. They share a full bathroom with sinks, toilet and tub/shower combination, but they also have their own sink in each of their bedrooms.Curtains for my niece 007

One of them asked me to help her figure out what to do about curtains for the window in her bedroom. I told her that I could make some simple curtains. There was a curtain rod already in place so we talked about how to hang them. I talked about making curtains with tabs and her response was “why can’t you just make a pocket and slide the curtain rod through it?” Music to my ears. The simplest way, an easy pocket to put the curtain rod through. I can do that. I was thrilled, then off she ran into the other room and came back with some brushed bronze colored shower curtain hooks and asked if I could use those. Sure. No more pocket, but a simple hem, add some button holes to slip the shower curtain rods through (as I crossed my fingers in hopes that the button hole stuff still worked on my old dinosaur of a machine (love my old machine!)

Curtains for my niece 004

She thought is was a bit odd to have a sink in her bedroom so I asked her if she was interested in having a curtain hanging there also. That way she could tie it back or just open it when she wanted to use the sink and close it other times. She thought about that for a bit and decided it was a great idea. So, we talked about how to hang that curtain and the easiest solution was curtain(s) with a pocket and a tension rod.

There is also a bulletin board that runs the length of one wall, so we planned to find some fabric to color that.

She has always liked aqua, but when we talked about colors I learned that she now likes blue and green combinations and that led to a conversation about the wall color (they were going to paint the room.) There was a fabric store nearby, so we printed out a coupon (gotta love that 40% off coupon!) and headed out the door.

Curtains for my niece 005

We walked through the fabric area so I could get a feel for where the different types of fabrics where, then we started looking at specific sections and colors. My niece quickly picked out a blue fabric for the curtains on her window, so I tried to guide her to fabrics that would go well with that fabric. She ended up really liking a batik in a rainbow of colors. There was enough on one bolt to cover the bulletin board and we had to find another bolt of a slightly different color for the sink curtains. There wasn’t enough on that bolt for the sink curtains so we went and picked out a coordinating color (green) to use as a filler to get the length needed to hang in front of the sink. I really wanted to do the pocket plus a few inches of the green fabric at the top and have the rest of the green balance the curtain down at the bottom, but she really wanted all the green at the top. Her room, her choice and she loves how it turned out.

Right after our fabric shopping spree, I headed up to the lake for a few days. I decided to wash all the fabric while I was there (there is a dryer there!) so when I got home to Texas I could just start right in on the sewing part of it all.

I have mentioned in other posts that I am not a seamstress, but I can sew some pretty good straight lines. These curtains where right up my alley.  In the past, there has been one problem that I always run into when sewing seems that have many layers, and that is the bit bump that they create where your presser foot has a hard time getting over the top of the bump and my needle can get off course as I sew down the other side and the thread can bunch up.  Well, I learned a trick….. and I will share it with you! I use a point turner! In the photo you can see it has a two little cut out areas. From behind,  the side, or the front, you can slide it around your needle and help bridge the height different where the multi-layer seam is raised up much higher than the other part of the seem you are sewing.

It works like a dream, maintains consistence for the presser foot and keeps the thread consistent too.

The curtains where mailed off this past September, and my niece loves them. I am glad that I could be a part of the process and share this with her.

Sincerely, Emily

Read Full Post »

D seems to be a hard one for me. I have been going through my photos and nothing that is remotely close to “D” is popping out. I did find a really great D in there.

My neighbor/friend that loves playing with wood made some beautiful walnut tops for the new reception area at our local Senior activity center. I have been in and out of his garage a million times while he was working on them. That walnut sure smelled good.228

I had gone with him once when he needed to see how things fit and the pieces were beautiful then, but WOW they look great finished and in place. So, this is the perfect D. D is for desk.

You can also see some other things that he has made.

So, as I am typing this… I remembered another photo I have that works.  D is for datura. This datura was a volunteer in the middle of one of the walkways in my garden. Full sun and simply beautiful! I would give it a drink when I watered the vegetables. All those blooms tells me that it was really happy there.

volunteer datura

volunteer datura

Sincerely, Emily

Read Full Post »

I started thinking about Halloween cards earlier this month, then a little tug in my memory somewhere made me think that I had already made them.

Off I went up the stairs in search (gotta do it while I am thinking about it or that thought is gone lately!)Oct 2013 2

Low and behold, there they were. Done! Good job Em!

After looking for a photo to use in the this post, I see that I made these cards back in February! I love it when I think ahead.

When I was making these cards, I remember running short on designer paper so I made up another version. Just added another layer of cardstock (black).Oct 2013 3

Here are some other Halloween cards that I have made:

You can also see some other holiday cards that I have been working on.

Will you be making some card this holiday season?

Sincerely, Emily

Read Full Post »

I am knitting again for the Special Olympics Scarf Project. Here is a link to the information for Texas. Towards the bottom of this post I have listed a link to Colouring with Yarn. They have complied a great list of the participating states and the details. One thing that I will add –  if your state is not participating, you can still knit/crochet/loom scarves – just send them to another state!!!001

I am trying to challenge myself with some new patterns, but still keep it brainless. I am currently working on an eyelet pattern  (scarf #3), that is not so brainless. I really have to pay attention. I have typed out the pattern large enough so I can read it from a distance and I use a piece of masking tape placed under the row that I am currently working on. That helps.

my method of keeping track of where I am - a piece of masking tape.

my method of keeping track of where I am – a piece of masking tape.

Are there any knitters out there? Row 3 in the pattern above ended in “k2tog, yo, k2top yo” ….  I would still consider myself a beginner, but ending a row in a “yo” just doesn’t make sense to me, so I reversed the order to read “yo, 2ktog, yo, 2ktog.”  Is that a misprint, or can you really end a row with a “yo” (yarn over)?

I have also come up with a way to keep the scarf out of the way as it gets longer. Boy, does that help a lot! There is enough cat hair on this scarf the way it is, I certainly don’t need to add more by letting it drag on the floor. How do you keep your scarf (or large project) out of the way as you knit?

How do you keep your project out of the way?

How do you keep your project out of the way?

With the Special Olympics Scarf Project you can knit, crochet or loom your scarves… what ever works for you. I can really crank out a crocheted scarf, but then my right hand is done in for several weeks… so I do the knitting. I have noticed with knitting this year, I am now feeling it in my hands also…. just can’t win. So I do a little at a time instead of an hour – that helps.

Here are some of the specifics for the scarves. Dimensions are:

  • 54-60 inches long
  • 6 to 7 inches wide
  • Pack scarves individually in zip-bags for mailing
  • The notes to the athletes are great, so by all means include those, we just ask you please not attach them to the scarves themselves.

Scarves can be made in any pattern and can be knitted, loomed or crocheted.
Please wash the scarf before sending it, especially if you smoke or have pets.

Click on the link to Colouring with Yard below for a list of the participating states.  some other states that are participating. If you do not see your state, pick another state, go pick up some yarn and start knitting. You can knit for any state that you want, as long as you are using the colored yarn for that state.

Colouring with Yarn has a great post showing the details for:

  • Alaska
  • Arkansas
  • Delaware
  • Indiana
  • Iowa
  • Kentucky
  • Kansas
  • Ohio
  • Oklahoma
  • South Dakota
  • Tennessee
  • Texas
  • Utah

Here are a few posts about the past scarves that I sent:

Do you knit (or crochet) for a cause? Tell us about it. Share links in your comment.

Sincerely, Emily

Read Full Post »

I went to my first swap this past April. I had heard of swaps but didn’t find one in my area until a friend found this one on a MeetUp page and told me about it.

Swap July 2013

Swap July 2013

The organizer set up a few guidelines and the rest is history. She holds it once a month.

There were a few guidelines to follow:

  • No money was allowed – this is all about the trade and bartering with what you have for what you want/need.
  • Items should be sustainably-minded. Something you have grown in your garden, something you conned/cooked/brewed/baked/preserved/dried, etc. Something your animals made (goat milk, hen eggs, lamb wool, etc.) Something you sewed/knitted/re-purposed, etc. Items to do with sustainable interests are also good (Mother Earth News magazines, cookbooks, cooking/camping gear, etc)
  • The items you should leave at home: this is not a garage sale, items should be about sustainability. Leave the knick-knacks at home.

Once we set up, we were allowed 15 minutes to walk around and check out the items other people brought so we could see what we were interested in.

Lemon pickles, Dill pickles, Homemade Teriyaki sauce

Lemon pickles, Dill pickles, Homemade Teriyaki sauce

Each month I have been posting about the swap over on my personal blog. About a month ago I realized that I hadn’t posted about the July swap and I thought it would be a good topic to post here. I have known the swap and barter system is out there and alive, and I realize that there may be others out there that are interested, but don’t know were to look or even how to get started.

Here are the other swap posts I have done”

Here are a few places to look to find swaps in your area: Note: I will add additional information to this post as I find it or as people comment. (updated 19 Sept 2013)

Would you go to a swap if you had one in your area?
Are you participating in a swap in your area?

Please use the comments to let others know about how to find a swap. If you out there participating in a swap, please comment with the general area you are in and add a link to the swap information.

Sincerely, Emily

Read Full Post »

Last fall when my niece was visiting us, we spent some time making cards (and doing many other things too.) At the end of our visit there was a lot of paper scraps and supplies spread all over my work table upstairs. My niece picked up a few smaller pieces of paper and asked about making some little cards with the left over scraps. What a great idea!

The tiny Valentine cards I sent to my two nieces were born from that idea. Using up the left over scraps.

paper scraps

I never throw my scraps away. They tend to come in handy at some point in my card making, and here I was digging through the plain paper scraps and designer paper scraps to make tiny cards. Now they have come in handy again.

For these tiny cards I used a heart-shaped punch and simply punches out the heart shape from the designer paper. I chose papers I thought each niece would like and tailored it to them with the colors. They can use these cards anytime of year to write a little note to a friend and it will be something special. YOu can even punch a hole and add a ribbon to turn it into a gift tag. The next time I do this I will cut the cards to size and punch out the design and also add a stamped element and let them each assemble their own like I did for my niece in this post.

Tiny Cards

Whether you use scraps of designer paper, old maps, scraps of fabric or even cards that you have received in the mail, this is one way to create another neat little card. A perfect way to reuse and recycle. I know I will be making more of these and including them in different gifts that I send to them.

Do you save scraps of paper or fabric with the hopes to use it later? Do you ever get around to using it?

Sincerely, Emily

You can see what else I am up to over at Sincerely, Emily. The topics are varied, as I jump around from gardening to sewing to making bread or lotion and many things in between.


Read Full Post »

Grams yarn hangersI am taking a chance and posting this before Christmas, hoping that my nieces are not reading! This is all about Gram’s hangers. Now, I know my Gram wasn’t the only person out there making these, but she was the only person out there making them for me when I was younger… hence, Gram’s hangars.

When I got a bit older (I’m guessing 10 or 12 years old), she taught me how to make them. I searched all of our closets looking for one of Grams hanger. Do you think I found one? NO!  I just wanted to look at it and work out how I was going to make them. Do you think I remembered how to do them?  Yes, and no! I worked it out rather quickly, but I knew mine are a bit different. In fact, when I took the hangars I finished to MN this past fall to wrap them up and stash them away for my nieces, my mom came in to see what I was doing and then started pulling hanger after hanger out of her closest. All Gram’s hangars! She has all of them! I couldn’t help but laugh.

Started at the base of the hookWhat I love about using these hangars is that my clothes don’t slip off the hangar (and I made them by recycling old wire hangars and gave them a new purpose in life)

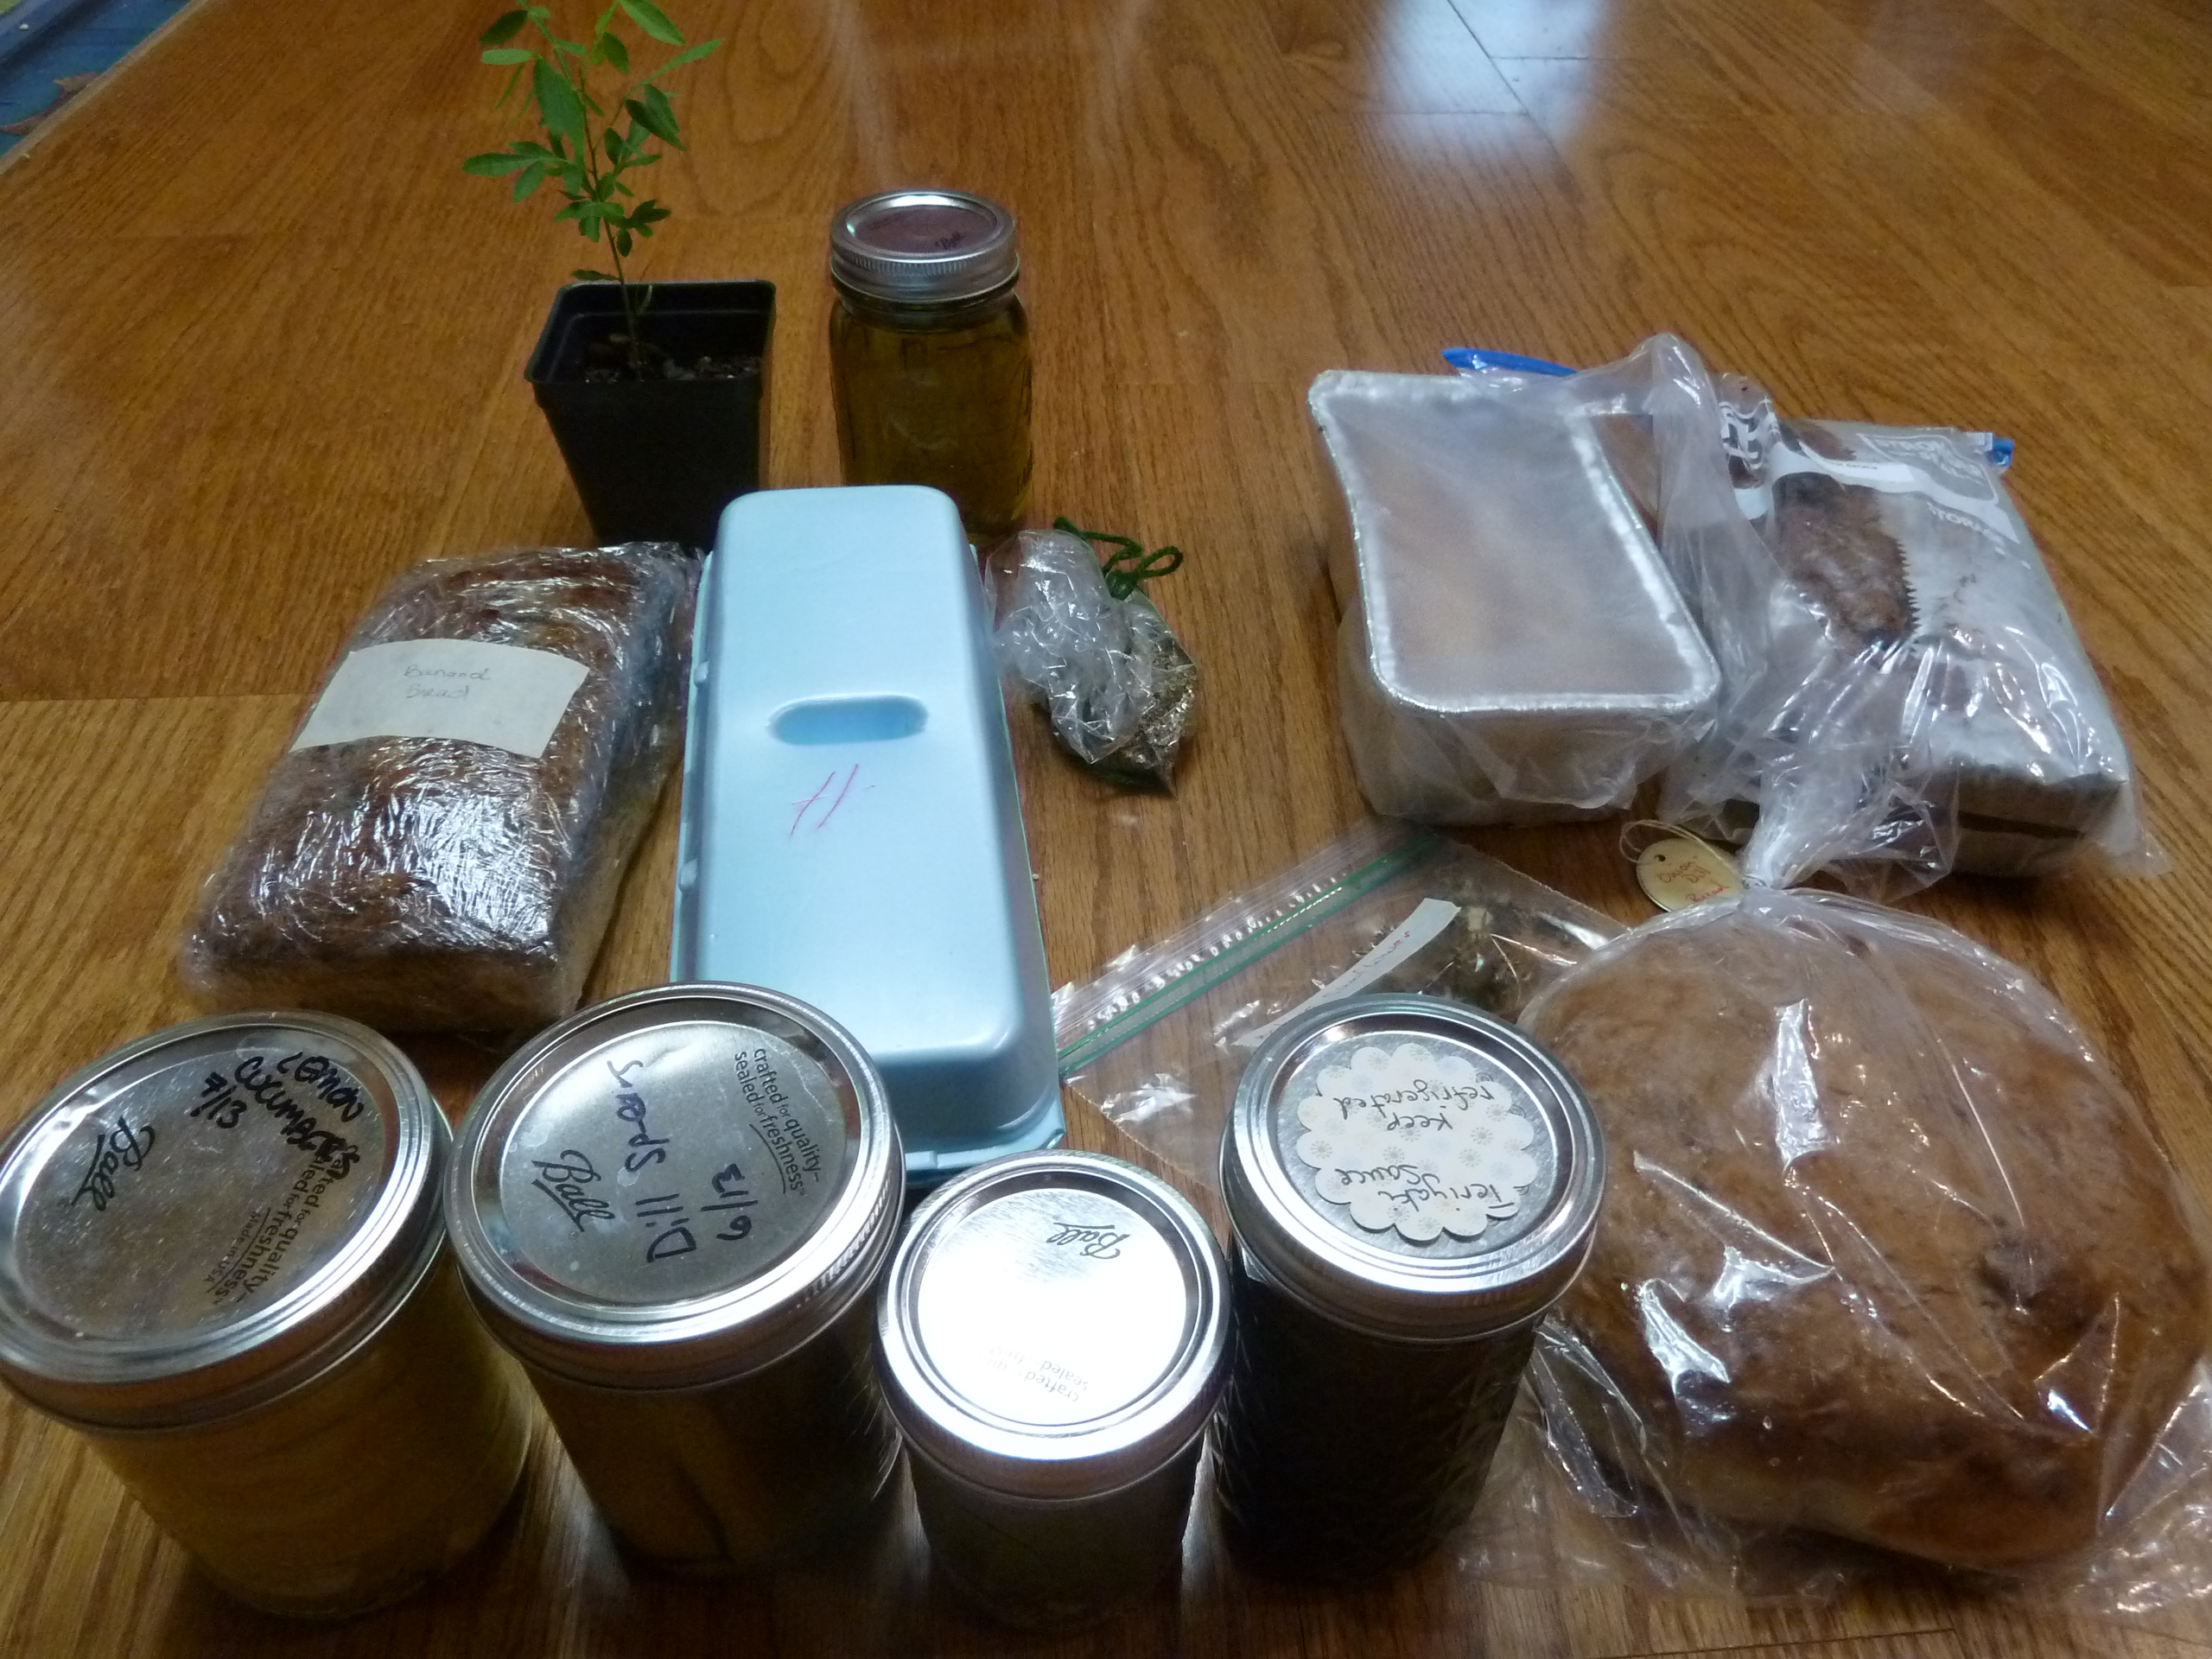
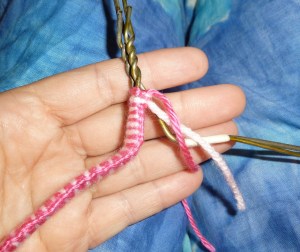
You start with two metal dry cleaner hangers that are of equal shape and size.  Tape them together in a few spots so you are fighting to keep the hangars together as you are working your yarn around them. You need two balls of yarn. They can be the same color or different colors, that is completely up to you, but the yarn does need to be in balls (not skeins). I could not remember how much yarn it took to make a hanger, so I bought two skeins of blue (for one niece) and two skeins of pink( for the other niece) and started wrapping them into balls. Make your yarn balls a manageable size so you can handle it easily enough and not be fighting with it to get it through the triangle form of the hanger at each pass. I made two hangers for each niece and have TONS of yarn left over. I could probably make them two more hangers each year for several years and still not run out (and hope they still like the colors I have!)

Make a loop

Make a loop

I started at the bottom of the neck where the hanger branches out and the worked my way around the hanger ending up back at the neck and then worked my way up to the top of the hook and back down to the neck. I know working my yarn over the hook and back gave it a bit of extra bulk, but I didn’t want to end at the top of the hook and have loos ends and knots up there where it gets most of its wear as it is put on your clothes rod and taken off over and over.

pass you yarn over the hanger and through the loop

pass you yarn over the hanger and through the loop

Tie both balls of yarn onto the bottom of the neck of the hangers leaving about a 6″ tail to work with later.  You want to keep one ball of yarn on one side of you and the other ball of yarn on the other side of you. I hold the hangar between my legs so that my hands are free to work with the yarn balls. I will mention that the chair that I sit on in our living room is an old swan neck rocker. It has open arm rests which isn’t the best situation because there isn’t much room on either side of my body to rest the yarn balls without them falling through the arms rest, off the chair, and unrolling out on the floor.

Pull tight

Pull tight

To make a “stitch” make a loop with your yarn and then pass your ball of yarn over the hangar and through the loop. Now pull it tight. The tighter you pull the more loops you will need to make to cover your hangar. The loosen your “stitches” the lass yarn. I made mine rather tight. From time to time you can also push your “stitches” so they are tighter together also. There are no rules here, do what ever you are comfortable with.

You can do one “stitch” with each color yarn or more. I did one hangar with single “stitches” and the other with two “stitches” with each ball of yarn before working the other side.

used single stitches on left and double stitches on right

used single stitches on left and double stitches on right

I finished by knotting my ends together and leaving about a 6″ tail on each end. I added pom poms that I made out of the same yarn and used the tail ends to attach them to the hangers.

Crossing my fingers that my nieces will love them.

Have you ever made yarn hangers?

Sincerely, Emily

You can see what else I am up to over at Sincerely, Emily. The topics are varied, as I jump around from gardening to sewing to making bread or lotion and many things in between.

Read Full Post »

The past two weeks have kept me more busy than normal. Volunteering, working on things for a banquet, a party here, meetings, etc., all mixed in with doctors appointments. I was really ready for these past weeks to be over.

A few nights ago was one of the parties and a group of us have been working for several months to get the decorations finished. It was a lot of fun, but also a lot of work.

004

Bringing a group together and working to come up with ideas that we all can agree with and be happy with can be a challenge. We really wanted to keep the decorations simple, but make a statement with an old-fashioned Christmas theme in mind. From a center piece on each table that was a simple as a stack of wrapped presents, to foot after foot of red and green paper chains. From a small handmade box with a treat for each person to other die-cut things on each table, I think we were successful.

025

The banquet went very well, and we had a lot of very nice complements on the decorations. That put a smile on my face.

Have you come up with some simple and creative ways to decorate for a large party or banquet? 

Sincerely, Emily

You can see what else I am up to over at Sincerely, Emily. The topics are varied, as I jump around from gardening to sewing to making bread or lotion and many things in between.

Read Full Post »

While reading Xan’s post yesterday about the benefits of being frugal, I started to think about how different a lot of our Christmas decorations are compared to most other people we know.  While we have purchased a few things, a majority of our holiday decor is inherited, hand made, bought on clearance at the end of the season, or a “treasure” taken from trash that belonged to someone else!  I thought I’d share a few of my favorites with you.

It’s big, and I’ve not seen anything like it,  but it’s one of my absolute favorite Christmas decorations.  We inherited this beauty from the husband’s Nanny several years ago…

Another decoration high on my favorites list is my grandma’s nativity set.  While I would prefer a Willow Tree nativity (as far as looks go, it’s much more my style), this one holds a great deal of sentimental value.  There are definitely a  few chips and nicks on these figures, and one of the wise men is missing a hand.  We just say it adds character!

We have received many handmade gifts and decorations over the years, but one of my favorites is this set of stockings.  A very kind lady from church made these as a wedding gift for us.  What a thoughtful gift.

Now, here is the disclaimer for the rest of this post…. the husband has some decorating favorites of his own!  He is all about the cheese factor.  He has been an avid Coca Cola memorabilia collector for as long as I’ve known him.  Several of “his” decorations have literally been saved from the trash.  We have a few of these grocery store cardboard “Santa Coke” advertisements scattered throughout the house.


While I was off on maternity leave with #2 (during the holiday season), the husband picked up a job cleaning a few banks in the area.  He found this “treasure” in the trash… new and in the box!  It was several years old, but had never been taken out of the box.   So of course it came home with him.

This sign is proudly displayed next to his full size leg lamp from “A Christmas Story” every year.  I will spare you that picture!  Another image I will leave to your imagination is the massive amount of garland he has strung all over the place.  It was all bought for pennies on the dollar at after Christmas clearance sales.

While we obviously have two distinctly different styles in decorating our home for the holidays, we make it work with a little compromise here and there (I decorate part of the house, he decorates the other).  The boys love it, and will always have great memories to share as they get older.  Best of all we spent little to no $$$ on any of it (except the leg lamp)!

How do you decorate your home for the holidays?

Read Full Post »

Older Posts »