Feeds:
Posts
Comments

Archive for October, 2009

When I was visiting a forum of mostly mothers the other day a woman posted the question of which was more important people or animals/enviroment.  She thought we had gone too far in protecting fish specifically at the expense of people.

As I ‘listened’ to the conversation unfold while other complained about out of work folks that the government wasn’t helping but had millions to spend on saving sea turtles.  They discussed eagles, global warming, factory farms, PETA, and many interesting subjects.

What hit me is that the original question seemed to be flawed (in my opinion)  as a farmer/parent/consumer/human being I don’t see it as an either/or situation.

It seems to me the disappearing turtles and fish are just a symptom of the larger illness that our planet if facing as a whole.  Waterways so polluted and over fished that these creatures can’t survive without our help.  How can we separate ourselves from the world we live in? 

Sometimes I see on the news stories about people who has been removed from a home that is so overrun with garbage, old food and feces that they cannot be allowed to live there for their own safety.  I always shake my head and wonder how people can live like that…

Doesn’t it seem reasonable to keep our world clean and safe for all the inhabitants…not to have it so polluted, and overrun with garbage and feces (from factory farms) that we cannot any longer inhabit it…that the turtles and eagles and fish can no longer inhabit it?

No I don’t believe it is a choice between man or the enviroment at all…

I don’t believe that its them or us…

No, I’m pretty sure as the turtles, fish  and eagles go… so do we.

geese1

Read Full Post »

Grow your own Mushrooms!

I have always loved mushrooms. When I was a kid, my Grandpa got one of those “Grow Your Own Mushrooms” kits in the mail. The terra cotta pot in which they were to be grown was shaped like a mushroom and had that funky sort of look that everything in the 70s had. Now grandpa had no intention of growing the “special 70s mushrooms”, but his setup would have made one wonder. Anyhow, he wanted a handful of button mushrooms so he set up the kit and did everything he was instructed to do…but he got no mushrooms.

10_18_2009 050

I always figured that since Grandpa couldn’t grow mushrooms, it must not be possible by the common man. I settled for buying mushrooms at the grocery store and ordering extra mushrooms on my pizzas. But there is just something not quite right about store bought mushrooms compared to fresh ones…sort of like everything.

07_14_2009 015

Fast forward a few years to present. I found a friend that also loves mushrooms and has been growing her own for years. We talked some and it turns out that it is incredibly simple to grow mushrooms.

First, you’ll need to order mushroom spawn from a reputable online source. One of the best sources is probably Fungi Perfecti. They have all sorts of spawn that can be purchased so pick what you like. I grow Shiitake. Anyhow, once you get your spawn (it will be a container of sawdust which contains the spawn), you’ll need a few logs cut to lengths about 3-4 feet. Hardwood logs are best for Shiitakes so I got white oak logs approximately 4-6 inches in diameter.

07_14_2009 019

Using a 3/4 spade bit, I drilled tons of holes in each log. I spaced them 6 inches or so apart across the entire surface of the log (I also burned up a drill doing this so don’t push too hard and take breaks!). In each hole, I packed the inoculated sawdust and sealed each hole with melted beeswax. I have bees so beeswax is easy for me to get, but you can also any food-grade wax to seal the holes.

The logs should be thrown out back and ignored for about a year. I set my logs on bricks to keep them out of the dirt. You can set them upright or lay them down in a stack. Make sure that the logs get plenty of rain and absolutely no attention whatsoever. If all goes well and the stars align properly, you’ll have mushrooms in a year (actually, I don’t think it is that complicated). Logs of the size I mentioned should fruit for several years if you give them the proper amount of inattention!

I’ll post again later about what to do with the abundance of mushrooms you’ll get when your logs fruit. You’ll probably have more than you can use so you’ll need a plan. Stay tuned for more b.s. (it’s mushroom food afterall!) in a few weeks!


Warren can also be found at My Home Among the Hills writing about the adventures of life in WV.

Read Full Post »

After giving it quite a workout this season, it’s time to store my pressure canner for the winter. This canner was an investment for me–one that I want to last me for a long, long time. So at the end of each canning season, I need to take the time to be sure it’s cleaned and stored properly.

I do get water stains from hard water. I tried a remedy I have read about. You fill the canner with water as high as the water stains go. Then, for each quart of water you used, you add a tablespoon of cream of tartar. Dissolve the cream of tartar in the water and boil until the stains are gone.

Too late, I realized I didn’t have enough cream of tartar to match the seven quarts of water I needed. I dumped in all I had and boiled it for about 45 minutes. It made a significant improvement. I will definitely do this next year with the correct amounts. Below you can see the difference.

Before and After Cream of Tartar Cleaning

Before and After Cream of Tartar Cleaning

Next, I washed the canner body inside and out with warm soapy water. I gave this same treatment to the rack that fits inside. I rinsed both well and allowed them to dry while I worked on the lid.

Because I have a dial gauge, I can not submerse the lid in water. I removed the rubber gasket from the lid and wiped the entire lid with a warm soapy rag, then rinsed with a wet rag, careful to avoid getting the gauge wet. I dropped a needle threaded with embroidery thread down the vent pipe and rubbed the thread around the inside of the pipe to clean it. I could have used a small pipe cleaner if I’d had one.

You should check your manual or contact the manufacturer for specific instructions for handling the rubber sealing gasket if your canner uses one. For mine, I swished it gently around in some warm sudsy water, then rinsed it well and allowed it to air dry. This is a good time to examine the gasket for worn spots, tears, or nicks in the rubber. (Worn or damaged seals should be replaced.) Once it was dry, I placed it back inside the rim of the canner lid.

Now that all the parts are clean and dry, I can prepare the canner for storage. I placed a layer of clean, dry newspaper on the bottom of the canner. Then, I put the canning rack on top of that. I wadded up a few pages of newsprint and tossed them inside to help absorb moisture and odors that might accumulate over the next few months of non-usage.

Newspapers Inside Canner

Newspapers Inside Canner

I placed the weight inside the canner so I will know where it is next time I need it. The lid gets placed on top of the canner *upside down* and not sealed.

Canner Lid Upside Down

Canner Lid Upside Down

And now it’s ready to be stored on a shelf or in a closet until it is needed again. You may want to make a note to yourself or mark your calendar to make an appointment with your extension office next spring to get your dial gauge tested. This should be done each year before canning season begins.

I bought this canner a couple of years ago hoping it would meet all the canning needs I would ever have. With proper care and maintenance, replacing worn parts as needed, it should last me for as long as I’m able to use it.

Read Full Post »

This past weekend we had our Harvest Celebration at Roberts Roost. It is a time when we gather our friends from the community to share food, fire, and talents, and to enjoy each others company. Most of all it is a time to talk about everything and nothing, to share stories, to laugh, to give and receive support without any agenda. Out of these conversations around the fire two ideas arose that I need to explore.

The first is the power and importance of community as we take the road less traveled. I’ll be posting those thoughts on NDiN.

The second is the power of community to act. I’ll be posting about that on Roberts Roost.

Part 1. The power of community on the road less traveled.

Saturday dawned cold and gray. Rain threatened and a cold wind made the final preparations for our Harvest Celebration difficult. By noon the pavilion was up, the last of the lights were strung, and the chili was bubbling away on the stove. Our out of town guests arrived, and the kids scattered, catching up with friends they hadn’t seen in several months. The rain started and with it calls started coming in, people canceling because of the weather. It looked like it was going to be a small party. We got our out of town guests settled in M’s lovely Hill House, made the corn bread, and started setting out food and drinks. The out-of-towners came back and helped set things out. The rain stopped, but the wind kicked up. Fires were built, outside in the fire circle, inside in the fireplaces. M and G arrived, looking around for the party. They found us chatting by the fireplace in the living room. We settled in, making introductions, finding drinks, discussing whether or not we should move the food back in the house. Then the wind died down, and people started arriving, bundled up in coats, bearing dishes of food, musical instruments, laughter, and smiles. A new mob of kids joined the rampage (the children didn’t seem to notice the inclement weather.) Food was served, drinks poured, and folks settled in around the crackling fire, perching on fence rails, straw bales, and logs. Another round of introductions (none of these people had met.) Stories were shared, successes celebrated, failures commiserated and solutions discussed. People shared laughter, songs, poems, and dances. Connections were made, commonalities discovered. The seeds of a new community were sowed.

Chatting with people in the days after our little party I discovered a surprising theme. The new connections that had been made while chatting around the fire sparked joy in people. There was a sense of camaraderie, of understanding, of fitting in at least a bit. Most of us who chose to walk the road less traveled are fiercely independent. We also find that most people we meet don’t understand what we do, why we do it. They think of us as weird, or quaint. It can be very isolating and lonely. Finding community is important. On line communities, like NDiN where ideas, knowledge, and stories are shared are a great form of support and inspiration. But local communities are key. People you can laugh with, help and be helped by, cry with, share with are vital to anyone wanting to thrive as a homesteader.

A party is a great way to build such a group. (You shouldn’t over analyze who you are inviting, serendipitous connections are the best, and you can’t plan those.) Just make an excuse to get people together to share food and drink, laughter and stories. Magic will happen and your world will be richer for it.

Alan can also be found at Roberts Roost writing about his families adventures on their micro-eco-farm.

Read Full Post »

ketchup

Iread an article over at Chiot’s Run the other morning about homemade ketchup that struck a note with me. We too have recently become fans of a homemade ketchup. It did take a while for us to make the switch but now that we have found the one I am not sure if we will ever go back completely to store bought.

I have noticed in my years and years of cooking that sauces are a VERY personal thing – – especially when we’re talking about home made. As a person who (without seeming as if I am patting myself on the back) is a pretty decent cook I have found that of all the things I make, sauces (ketchup, meat sauces, etc) are the most likely to be out right rejected by people who generally love my cooking.

I am not talking just my kids here, but friends who beg for recipes. For some odd reason we seem all to pretty much agree on store bought ketchup—I mean they’re like a total of 3 main brands in the U.S to choose from (but maybe the right word is tolerate).

Yet, when it comes to home made—watch out! Everyone, and I do mean everyone, has their own ideas on what makes a good ketchup.

And beyond that love it or hate it sauce mentality if you decide after reading this and Chiot’s Run’s article to make your own ketchup, be prepared to tweak and experiment with recipes. From what I have personally experienced, and heard other sauce makers comment on, a recipe is never perfect straight from the book–especially when it’s a sauce.

I also find it is important with condiments to make a small trial batch first before I can up 15 quarts. If I don’t I risk ending up with 14 and ½ jars of something that won’t get eaten. The other ½ jar was the part everyone tried and decided they didn’t like it.I offer that tid bit of advice with the best of intentions because of course years ago when I tried making ketchup for the first time that is exactly what I did. It was one of the years that I had a dearth of green tomatoes. Of course I often have that problem most years here in the south, but that was the year I thought I would try and be Lil Miss Homemaker and whip up some home made green tomato ketchup. Sounded good to me. Tomatoes, spices, vinegar —all the same no matter what recipe you find. Or so I thought. Well, needless to say that particular trial was a dismal failure. It was twangy and tart and overall not like anything I would enjoy swallowing with my fries. And, unfortunately, it kept me from trying to make ketchup for many years afterward because I just really wasn’t sure exactly what constituted “good” ketchup. Most store bought brands seemed to taste just like sugar and tomatoes so I wasn’t sure how to tweak the recipe to improve it. I just knew I had not liked that one. BBQ sauce? I know how to tweak that because there are so many many to choose from to give inspiration…. but ketchup….I was stumped.

Of course, as all you readers can understand, one of the reasons for trying to make ketchup was because I wanted to be able to move away from store bought that was lacking in flavor, full of corn syrups and ingredients I couldn’t pronounce and try to be just a bit more self sufficient. My usual reasons for doing anything. And I do realize that making ketchup does not put my household into the “never going to the store again” category…but hey, it gets a bit closer with each added thing. And ketchup was a “thing” I wanted to add. In addition it puts a quality product on the table. Or burger and fries anyway.

And if your wondering exactly why it failed I’ll have to go with the hot/cold/leftover explanation of cooking (that’s my official made up term for this dilemma). As everyone that cooks knows when your seasoning food while it is hot it tastes just a bit, and sometimes quite a bit, different than it does cool or cold or after sitting for a while to blend. Kind of like how our soups and stews always taste better leftover—all those spices blend together. Add heated vinegar to the tasting dilemma (ketchup is really a form of pickled fruit or vegetable pureed sauce) and it can get really bad in regards to taste distortion. At least while hot. Which is why you should always make notes in your pickle recipes, let them cool to sample, and never ever can 15 quarts right away.

Luckily all was not to end without ever finding a great ketchup….happily this year I did find a new recipe to try. And since I did not can 15 quarts right away….I will need to make more in the not too distant future. But that’s o.k. This one seems to be the perfect recipe for my family too. As a matter of fact my husband likes this ketchup SO much that he is about ready to carry it in my purse for when we do eat fries outside of home { notice I say MY purse 😉 }

We probably need to add one more ketchup recipe to our pantry since unfortunately this one is not completely sustainable for me since I can not grow the one main ingredient that sets it apart from other ketchups. And what is that you ask? Well, it is bananas for an absolutely fabulous Banana Ketchup. Yep…you heard me correctly. And I know you maybe wrinkling your nose at it—because most everyone does. But believe me if your into home made ketchups and sauces, you should like this. I am almost sure anyway. A number of our friends think it tastes just fine. Not at all like they expected it too when they first made their odd faces about it. Beyond the recipe the book I got it from is quite interesting so check that out too if you’d like. You can see it in the picture above and I linked off to it in addition.

Of course, I did tweak the ketchup a bit AFTER letting it sit over night and cool. I am teachable after all and do learn from my experiences most of the time. And this time I did find that it needed a bit of changing to fit my family’s tastes so I added almost double the bananas and tweaked the seasonings and vinegar just a teeny tiny bit.

No matter the changes, it was still good in its original form. But just a bit better my way I thought ;-).

So…here it is in its original form from the book The Good Stuff Cookbook by Helen Witty.

Hot and Spicy Banana Ketchup –Caribbean inspired fruit sauce

1 cup raisins, dark or golden

¾ cup chopped onion

3 or 4 garlic cloves, peeled

2/3 cup tomato paste

2 and 2/3 cup white or cider vinegar

3 pounds very ripe, fragrant bananas

4 to 6 cups water

1 cup packed dark brown sugar

1 tablespoon salt

1 teaspoon cayenne pepper (optional)

½ cup light corn syrup (I used regular sugar since I do not buy corn syrup)

4 teaspoon allspice, preferably freshly ground if available

1 and ½ teaspoons cinnamon

1 and ½ teaspoons grated nutmeg

1 teaspoon ground black pepper

½ teaspoon ground cloves

¼ to 1/3 dark rum (I did not use this at all)

1.Combine raisins, onion, cloves, and tomato in a blender or food processor and puree until smooth using some of the vinegar to help. Scrape into a preserving pan (or large stock pot).

2.Peel the bananas, cut them into chunks, and puree them using some of the vinegar again. Add to mixture in pan and add any remaining vinegar, plus 4 cups of water, the brown sugar, salt, and ground hot red pepper.

3.Bring the mixture to a boil over medium high heat, stirring frequently. Lower the heat to medium low and cook the ketchup, uncovered, for approximately 1 and ¼ hours, stirring often. If there is a threat of sticking at any point at water up to the remaining 2 cups (I did not ever add the extra water as the whole point is to cook the ketchup down until it is thick. Plus I did not have sticking issues at all.)

4. Add sugar and spices and continue to cook for another 15 minutes or until it is thick enough to coat a metal spoon. Don’t forget to stir. To test if the consistency is correct remove the pan from the heat and spoon a bit of the ketchup onto a saucer. Let it cool (put in fridge or freezer for a bit); if very little or no liquid emerges around the sample, the ketchup is thick enough. If it does not pass this test resume cooking for as long as necessary. Let the pan and contents cool for a few minutes when you get the correct consistency ( This was were I cooled mine overnight to allow for flavors to mingle so I could see if I would like the balance of flavors).

5. Puree the ketchup again in the blender or food processor until it is satin smooth. You can also force it through a fine metal sieve or food mill. Rinse out the pan and return ketchup and taste for hotness, sharpness and add more red or black pepper or more vinegar or sugar as needed. Be cautious about adding more of the spices because their flavors will strengthen later. They shouldn’t dominate the fruit.

6. Bring the ketchup to a boil again over medium heat, stirring constantly. Add the rum if you so choose and remove the pan from the heat. Ladle the boiling hot ketchup into hot, clean half pint or pint canning jars, leaving recommended head space. Seal with lids in a boiling water bath for 15 minutes for half pint and 20 minutes for pints. Wait at least two weeks for best flavors. (You can also store this in the fridge if you prefer not to can. Possibly in the freezer. One larger jar was in our refrigerator for about a month while we finished it. No problems encountered at all.) Makes about 7 cups.

After step 4, where I allowed the ketchup to cool over night, I then tweaked it. I found I wanted a bit more pronounced banana flavor and a slightly different balance of the spices. Both easily corrected. And to make sure you don’t ruin the whole batch put a small amount into a bowl and add your additions to see how the flavor changes there before doing the entire pot full.

Don’t think this is your style? The book also has a cranberry ketchup and a mushroom ketchup to try.

Anyone else have a unique ketchup they like that most people are unfamiliar with?

Read Full Post »

hands3As I was posting about our grape harvest on my blog last week I was drawn to the pictures of my children’s hands…

These hands were busy picking…

And then popping grapes into mouths…

It got me thinking about all the things my childrens’ hands do each day…

All the wonderful things they have learned to do on the farm…


hands2

My kids’ hands know that grapes grow on vines, planted in the ground, tended and harvested in the warm sunshine…

eggs shirt

They know how a warm egg feels fresh from the nest…and know to be quick to avoid an irate hen!

wash4

rabbit5

They know that bunnies are ohhh so soft…and camels…well not so much!

blackberry picking6

Those hands have been scratched by wild blackberries…but have found that their mouths thought it was worth it!

potato2

They have dug potatoes that they themselves had planted…

tomato napper3

Those hands have snuck tomatoes from their mama’s bowl right in the garden…and felt no guilt whatsoever!

pumpkin soup6

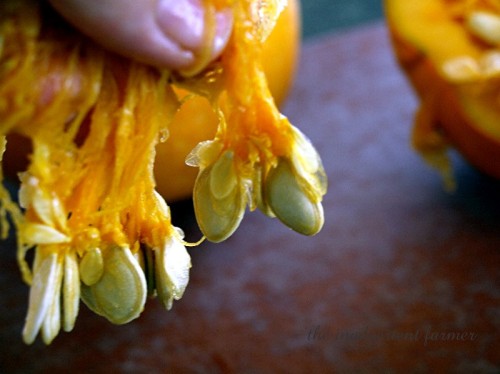
Little kids hands are good at gutting pumpkins…especially when the pumpkins are from their very own patch!

eat watermelon9

My childrens’ hands have learned to care for animals…and that camels like watermelon!

muddy9

They have learned that the sweetest gift can be a wildflower…both to their mama and all the beneficial insects that they hold in the garden.

blue breakfast1

As little as they are these hands know that blueberries do no grow in cartons on the grocery store shelves…

frog2

And if you hold really, really still you can watch a tree frog breath as it sits on your thumb!


Yes it is amazing what little hands can learn…

It will be even more amazing what these little hands will do in the future to nurture and take care of the earth that they have grown to respect and love…


And sometimes eat…

Yummy, dirt good mama!

If you say so Baby Boy!

fun10

Kim can also be found over at the inadvertent farmer where she raises organic fruits, veggies, critters, kids…and a camel!

Read Full Post »

Living a life ‘not dabbling in normal’, whatever the ‘not normal’ is, can be fraught with uncertainty when you have kids. Not uncertainty about how you’re living your life, but uncertainty about how your kids see it, how they’ll feel about it as they grow older, and if they’ll choose this life for themselves or go in a different direction. Now I’m certainly not wanting my children to choose a life that they aren’t in love with simply because it’s the way they grew up, but neither do I want them to shun a life they would love if it weren’t for rough or unfulfilling childhood experiences. My husband and I are always keeping this idea in mind – making our life appealing to our children – when we make decisions about what animals (or how many) to own and what to include in our gardens. Today I’m going to talk about the animal side of it.

A few weeks ago we found out that a nearby dairy had some half-Brahma, half-Holstein newborn calves for sale. We decided to try to get a few heifers for our daughter’s herds.

DSCF6803

Yeah, they have their own herds. Small herds, of course, but herds nonetheless.

We include the kids in what we do as a matter of course – they can’t be left alone in the house while we chore, so they chore with us. This has led to them owning their own animals, having their own garden, and us having to answer a lot of questions. It all started with some lambs.

For a few years, I raised a lot of bum lambs every year. When Hannah was old enough to help bottle-feed lambs, she was given two of her own to raise.

2006-04-04 54 Rupert-Sarah,Hannah & Neil feeding lambs

She was responsible for helping me mix bottles and feed them to her lambs. When they were on grain, she helped her Daddy measure it out, and when they were on pasture, she checked on water with me every day. She watched them grow, she loved them, she got excited about selling them to buy a saddle for her pony, and she cried bitter tears when they were actually sold. (But she loves her saddle.)

Then I used my own lamb money to get LaMancha goats.

2007-03-21 002 Hannah playing outside

When she was old enough to help me with milking chores and showed an interest in the goats, I gave her one of my goats. Then that goat turned out to be a ‘cull’ goat, so I traded her for one of my keepers. Her new goat had babies three days later, so she was happy with the trade.

DSCF2602

While Beauty (the doe) was in milk, Hannah helped with the chores daily. She helped me put the kids up at night, got them their feed and water, played with them to keep them friendly, and let them out after milking the next morning. She helped wash teats before milking and she and Ains even tried milking on a patient doe.

DSCF8548

Ainsley has shown no interest in the goats besides playing with the babies, so she doesn’t have any yet. I’ve talked to Hannah about buying one of the babies from her (he’s a nice buck) and she’s been receptive, but I’ll have to pay. A dollar. My husband thought it would be a good time to go over basic economics with her. She thought he was ‘cracked in the head’ if she was going to make her mother pay more than a buck for her buck. We’re still hashing that one out. She’s also considering selling her baby doe, so we’re going over that with her too. Feed costs for the winter, amount she could sell her for, what she could do with milk she gets from her if she keeps her (not to mention more babies) … It may seem like a lot to be discussing with a girl that’s not even six years old, but it never ceases to amaze me what kids catch on to when they’re interested in something. She’s thrown around the idea of selling the baby doe and buying a rabbit cage and a “mommy and daddy rabbit so that I can sell the babies”. We would definitely have to do a lot of discussing for that one.

It’s not always about giving the children animals of their own. Take the chickens and turkeys for example. None of the poultry belongs to my daughters – they’re not that interested – but they’ve always helped with the chores. Watering, feeding, and especially gathering eggs are easy chores for the little ones.

2008-11-15 01 Heiners at Cascade

When the girls see what we do with fresh eggs, they’ll make trips out to the pen just to see if there are any fresh eggs – Hannah wants them for Egg Drop Soup, Ainsley wants them for Marshmallow Meringues.

And it’s also not always about my own kids and what they gain from it. Every year that my sister visits us, we get two piglets to raise (the other years we buy ready-to-harvest hogs from a trusted grower) simply for her son when he visits. Don’t get me wrong, I *love* raising piglets, it’s just that it’s one more type of animal on our place and I’m stretched a bit thin as it is. But it’s worth it when I see my nephew who lives in the city but loves pigs get to be around them as much as he wants.

2007-07-17 10 Cindy in Idaho

It’s wonderful to see how kids just naturally do what they need to do to be around what they love being around. When he’s here, I don’t have to worry about any chores except for milking. On his first day here, I walk him around the farm and show him what I do. The next morning when I walk out to do chores, he’s just finishing them all up. Amazing.

But back to the calves. Two years ago, we had the same opportunity with calves. Inexpensive heifer calves and two little girls that were needing more outside time (it was early spring and we had cabin fever). Twice a day we bundled up and took milk out to our baby calves. Each girl got a heifer and my husband’s herd got a bump of four heifers. Those heifers are having babies now and the girls ask to see them every time we travel to Wyoming where they’re living right now. When we do cattle work in Wyoming, the girls are there and as involved as they can be. When we’re figuring out feed costs for the winter, they’re as involved as is age-appropriate. When we feed in the winter, they’re out there gathering hay bale twine as we feed. And when they heard that Daddy was getting some half-Brahma, half-Holstein calves, they wanted in.

So far, we’ve only gotten one heifer calf and two steer calves and we don’t know if any more are coming. Hannah’s taken the heifer calf and Ainsley’s taken the beautiful red steer. I see more tears in the future, but for now it’s feeding the calves every morning and night… (my little girl that doesn’t like to get up before ten a.m. gets up happily at 7:30 a.m. to feed her Cassina)

DSCF6994

and answering lots of questions – some of them a bit awkward.

DSCF6160

And hopefully, just maybe, making this life interesting enough that our kids will not be scared off of choosing it for themselves as adults.

Read Full Post »

Our kids cook a lot.  We started out having them help us with what ever we were making.  They learned to mix, measure, crack eggs, identify ingredients, etc.  Gradually we did less and they did more.  Now JJ, who is 11, can make many things from scratch without any help from me at all (except getting a few things off high shelves she can’t easily reach.)  Lot’s of people think cooking is too hard or too dangerous for kids.  It’s not.  It does take some training (which is good, fun time spent together) and it takes a certain amount of willingness to accept messes (kids can’t cook without covering everything in flour and goo) and occasionally odd results.
 
 
Cinnamon Rolls


YUMMM!

Alan can also be found at Roberts Roost writing about his families adventures on their micro-eco-farm.

Read Full Post »

A friend recently said to me that they wouldn’t want to mess around making sausage because for the amount of product his family ate it didn’t seem worth it to bother with it. Time wise I mean.

I completely understand how he feels because I have felt the same way before. Not specifically about sausage but I could fill in a number of other things that I felt originally, for whatever reason, weren’t worth me doing –when put into my “wasn’t very good doing it” limited time to product perspective anyway.

Yet years down the road I know find myself doing things that I consider too “time consuming” and “not worth it” like canning potatoes, making applesauce from scratch (even after the canned jars have been used up), making hamburger rolls on the days we want burgers, making homemade stock with some extra to freeze or can, grinding grains, and many other “hard and time consuming” things.

I do all these without really taking much more time than it would for me to run to the store and pick them up. Of course we all know that the quality is far superior to the store bought and well worth the extra time. I also don’t completely do all of this because I feel that home made food taste better and is cheaper than store bought either—though those are two of my main reasons. Truthfully I make many of these items from scratch because I am now so comfortable doing them and it has become so ingrain that it really ISN”T that much more time —-and it DOES taste better and cost less.

A number of things have led me to this point in my life though. I didn’t get here because I am super woman, and I didn’t get here because I do in fact stay at home. I got here through small steps and small attempts.

Over the course of time I have added these things slowly. As I have became successful and comfortable with those I initially began with….I then added others to attempt. No matter how stressful it seemed at first…each attempt yielded better and better products until I no longer had to think about doing it. I have made bread so many times now that I do not even need a recipe for the two main types we eat. For less eaten breads like bagel or English muffins—I still need a recipe. But I am overall so comfortable with making bread now that even a recipe that is new or not memorized takes very little extra time out of my day.

Unfortunately I do find myself occasionally saying things similar to my friend above. I, like all people of my generation, seem to feel that going to a store and buying something pre package represents quicker food. I also, like every one else fall into the trap that something unfamiliar is by far harder and takes longer—especially when someone has already done it for you. How often though, living out in the country, has it taken me just as long to get to a good restaurant, or even to the closest open grocery store? Often it would have been quicker for me to make something in my kitchen. Maybe not a 4 hour pot roast but I can make a batch of marinara sauce and spaghetti in probably the same amount of time it takes to go across town to my favorite Mexican restaurant. Better than spaghetti….I can whip up tacos even quicker—even if I do home made tortillas. Mine may not be quite as perfectly round as the restaurant’s….but they taste just as good.

I notice that we don’t seem to count driving to and from the grocery store….and our time strolling around in it…in the “cost” of these so called quick foods. Yet…..we consider a trip to the store at 5 o’clock after work to be easier than going home and making something. Ick..I hate going to the store at that time because it is swamped with people.

So, what about harder things though like sausage? Or homemade pasta? Or even canned foods?

These are all things that once you do them more than twice….you start to build your own routine. Falling into a groove so to speak. A groovy groove. I think it takes at least two times to fumble through some of it and then after that it starts to move into the easier or just as easy category because you know, and are becoming comfortable with, what exactly needs to be done. And since many of these “time consuming” tasks can be scaled up to include many days or weeks worth of product ,we actually end up saving time. Saving time by pre preparing our meals (at least partially) and saving time by removing some of the time spent in stores. Maybe not right at first but over time. Canning is a great example of that. Yes, it takes time and it does mean you have to spend a number of days in the kitchen. Yet when accomplished days and days and even weeks worth of meals are done.

Another example I have for this time to savings is our dairy cow. When our cow first calved and we started milking we felt very out of sorts, rushed and limited in time. Never quite seeming to have a handle on all the paraphernalia, and routine, that went with the milking. However it didn’t take long to develop a routine with our cow and milking her. And to get all our paraphernalia together cosistently. We then added the routines of dealing with our extra milk like making butter, separating off cream, making cheeses (still working on getting tasty cheese though ;-D) always going back through the “are we doing it right” or “what storage containers will work best” and many other items that required us to learn how to deal with them.

Yet…all fell into place. And of all the things we have ever added to our home the care of our cow has actually worked out to be something that we get that time to value wise is immeasurable. It has also decreased our time going to and from the grocery by so much (very odd I know) that we found we then needed to plan and stock up on other groceries because we were no longer there many times a week. Kind of steam roll effect. Or rock down a hill. The momentim every time we added one of the “labor intensive” task was great. Moving us more and more into higher quality food, better health, time savings and just plain enjoyment of what we accomplished.

As I have added each task to my life…sausage making, animal butchering, making breads, milking cows…..they all seemed as if they would clutter my life to the extreme. Yet as I became comfortable with each task they actually allowed me how to save time in other places. And…I still vacation and I still go to visit my family. We still have time to hang with friends and to get projects done on the weekends.

As I come to the end I am not sure I really made a point but I think I will sum it up this way: Add some homesteading and self sufficiency skills to your life. You wouldn’t be reading this blog if you weren’t interested in them. Begin slowly…adding one at a time until you feel comfortable with it. Then…add another, whether it’s making sausage, caring for livestock or even canning up all the soup you eat every year.

Over time we build the skills and the tools to do these things second nature without rushing off helter skelter for something we forgot. Eventually you will become so good at whatever it is that you won’t forget—but it does takes practice and time at first. As I always tell my children: Don’t worry if it comes out badly at first, practice makes perfect. And sausage is still edible even if you leave it too chunky or rip the sausage casing.

Read Full Post »

As promised part two to my personal bread challenge (if you are looking for part 1 it can be found here.)

Now down to the nitty gritty…or they yummy part!

First of all here is my make twice a week whole wheat bread recipe that is almost identical to the one that my folks made for so many years…my go to recipe…everyday bread for sandwiches, toast, and just because I feel like bread!

Mix…2/3 Cup Oil (I use organic canola), 2/3 to 3/4 Cup Sweetener (honey, molasses or a combo), 5 1/2 Cup very warm water.

Add…3 Tablespoons yeast and let proof (stand until the yeast is all puffy!)

Mix…4 heaping Tablespoons Vital Wheat Gluten, 2 Tablespoons Salt, your ‘extra’ flours up to 4 cups (I usually use 1 Cup rye, 1 Cup oat, and 2 Cups White Whole Wheat flours)…you do not have to add these flours but it is fun!

Mix into liquid/yeast mixture.

Then add your Whole Wheat Flour

In total you use about 14 Cups of flour (this includes the ‘extra’ flours)…this is approximate as it is slightly different each time.

All of this I do in my Bosch Bread Mixer…you can do it by hand.

Knead 10 minutes. Turn into very large oil coated bowl.  Cover and let rise until doubled.  Punch down, form into loaves and let rise till it is about an inch above the rim of the bread pans.

Bake at 350 until a deep golden brown (or 195 on a bread thermometer)(or until it sounds hollow when tapped)

This makes 6 loaves or 1 large pan of sticky buns and four medium loaves.

big bread2

My sticky buns are made from this recipe.  I pre-cookk raisins with brown sugar and cinnamon and then roll out my dough into a rectangle and add the raisins on top.  Roll into a long log. Slice into rounds and put in a pan that has a little oil, brown sugar, cinnamon and chopped nuts at the bottom.  Flip the whole thing over when done so the sticky bottom is on the top and the plain top is on the bottom.  I am trying hard to resist the urge to be humorous here about sticky bottoms and sticky buns…but I will refrain!

bread34

Next is one of my all time favorite recipes it is directly from the back of my bag of King Arthur Flour’s organic cracked wheat.  I don’t make it for us anymore since going vegan but I still make it for my friends and they always appreciate it….it is heavenly!

Pour 1 1/4 Cups boiling water over 1/2 Cup Cracked Wheat in a large bowl, cover and let rest for 10 minutes stirring occasionally.

Stir in 2 Tablespoons butter, 1 1/2 teaspoons salt, and 1/4 Cup Honey or Molasses let cool to lukewarm.  Add 2 teaspoons yeast and let proof for about 10 minutes (skip this step if using instant yeast)

Stir in 1/4 Cup organic dry milk, 1 Cup Whole Wheat Flour, and 2 Cups White Whole Wheat or All Purpose Flour ( I used White Whole Wheat)

Knead by hand, mixer or bread machine to make a soft slightly sticky dough (8 minutes by hand is what I did).  Let rise covered till doubled (1 1/2 hours or so).  Shape into loaves and put into 8 1/2 x 4 1/2 inch loaf pan.  Cover and let rise till 1 to 2 inches above rim.  Cut a vertical slash down the middle of the loaf place in preheated 350 F oven.  Bake for 35 to 40 minutes until brown and hollow sounding when tapped or 195 degrees F on instant-read thermometer.

Makes 1 loaf.

bread17

Finally there is a whole book that Alan asked me about that I use often.  It is called Artisan Bread in Five Minutes a Day. It truly is a time saver and an incredibly easy way to make bread.  My go to recipe is the olive oil dough that I use with white whole wheat flour for pizza and focaccia bread.  There are recipes galore in there although most are not whole grain.  It takes a little playing with the recipes to adapt them for whole grain flours but it is well worth it.

The concept of this book is to mix without kneading, let rise and then put the dough in the frig for use every day.  Just grab some, shape, sometimes let it rise or sometimes not (depending on what you are using it for) and voila…bread in just minutes of prep time…awesome!  It keeps from 5 days to almost 2 weeks depending on the recipe…if you love sourdough leave it in he fridge a week and use, yummy!

Now for the technical stuff.  I use a very old Bosch Mixer, Grain Master Whisper Mill for grinding grain, I order most of my grains from Azure food co-op with some speciality flours from King Arthur.  King Arthur also has a great book called Whole Grain Baking…wonderful recipes!

eat4

Lastly as far as baking with kids here are a few hints to make it easier and more fun.  I bake with two little ones ages 6 and 2, they both have their own stools to bring to the counter (although the baby ends up on the counter most often) They each get an itty bitty bread pan or two to make their own loaves…trust me this can take a loooong time.  We use measurements and reading recipes for reading and math for homeschool.  We often give bread as gifts which the kids love…they make a card and tie the loaf up with ribbon.  Sweet Girl likes to experiment with different spices in her bread…some have been hits (pumpkin pie spice) some not so much (white pepper).  Remember this is a learning experience for them…this is how we bring up the next generation of bakers and lovers of real food.

Most of all have fun…take the time…it is seriously worth the effort!

eat2

Kim raises organic fruits, veggies, critter, kids, and a camel over at the inadvertent farmer

Read Full Post »

Older Posts »