Feeds:
Posts
Comments

Posts Tagged ‘Sewing’

Two of my nieces have sinks in their bedrooms. They share a full bathroom with sinks, toilet and tub/shower combination, but they also have their own sink in each of their bedrooms.Curtains for my niece 007

One of them asked me to help her figure out what to do about curtains for the window in her bedroom. I told her that I could make some simple curtains. There was a curtain rod already in place so we talked about how to hang them. I talked about making curtains with tabs and her response was “why can’t you just make a pocket and slide the curtain rod through it?” Music to my ears. The simplest way, an easy pocket to put the curtain rod through. I can do that. I was thrilled, then off she ran into the other room and came back with some brushed bronze colored shower curtain hooks and asked if I could use those. Sure. No more pocket, but a simple hem, add some button holes to slip the shower curtain rods through (as I crossed my fingers in hopes that the button hole stuff still worked on my old dinosaur of a machine (love my old machine!)

Curtains for my niece 004

She thought is was a bit odd to have a sink in her bedroom so I asked her if she was interested in having a curtain hanging there also. That way she could tie it back or just open it when she wanted to use the sink and close it other times. She thought about that for a bit and decided it was a great idea. So, we talked about how to hang that curtain and the easiest solution was curtain(s) with a pocket and a tension rod.

There is also a bulletin board that runs the length of one wall, so we planned to find some fabric to color that.

She has always liked aqua, but when we talked about colors I learned that she now likes blue and green combinations and that led to a conversation about the wall color (they were going to paint the room.) There was a fabric store nearby, so we printed out a coupon (gotta love that 40% off coupon!) and headed out the door.

Curtains for my niece 005

We walked through the fabric area so I could get a feel for where the different types of fabrics where, then we started looking at specific sections and colors. My niece quickly picked out a blue fabric for the curtains on her window, so I tried to guide her to fabrics that would go well with that fabric. She ended up really liking a batik in a rainbow of colors. There was enough on one bolt to cover the bulletin board and we had to find another bolt of a slightly different color for the sink curtains. There wasn’t enough on that bolt for the sink curtains so we went and picked out a coordinating color (green) to use as a filler to get the length needed to hang in front of the sink. I really wanted to do the pocket plus a few inches of the green fabric at the top and have the rest of the green balance the curtain down at the bottom, but she really wanted all the green at the top. Her room, her choice and she loves how it turned out.

Right after our fabric shopping spree, I headed up to the lake for a few days. I decided to wash all the fabric while I was there (there is a dryer there!) so when I got home to Texas I could just start right in on the sewing part of it all.

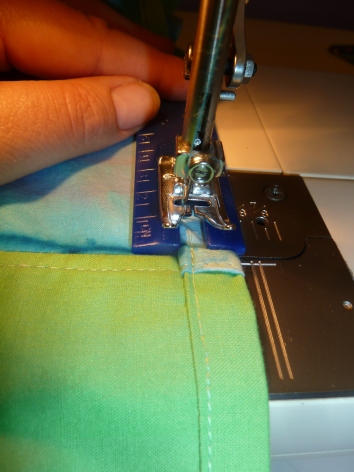
I have mentioned in other posts that I am not a seamstress, but I can sew some pretty good straight lines. These curtains where right up my alley.  In the past, there has been one problem that I always run into when sewing seems that have many layers, and that is the bit bump that they create where your presser foot has a hard time getting over the top of the bump and my needle can get off course as I sew down the other side and the thread can bunch up.  Well, I learned a trick….. and I will share it with you! I use a point turner! In the photo you can see it has a two little cut out areas. From behind,  the side, or the front, you can slide it around your needle and help bridge the height different where the multi-layer seam is raised up much higher than the other part of the seem you are sewing.

It works like a dream, maintains consistence for the presser foot and keeps the thread consistent too.

The curtains where mailed off this past September, and my niece loves them. I am glad that I could be a part of the process and share this with her.

Sincerely, Emily

Read Full Post »

I have to laugh, because I have a great old sewing machine(affectionately called “The Dinosaur!”) Oh, it has had quite a work out over its lifetime, but one reason I am especially happy to have it is for patching things.Why? Well, I would much rather save the money than go out and buy new shorts just because there is a tear in them when I can fix it. Call it frugal. Call it cheap. Call it whatever you want, but I call it resourceful and I just saved a bunch of money.

It does get used for other things, in fact you may remember a post I did around the holidays about making napkins. I also posted recently over at Sincerely, Emily about being motivated to sew and I mentioned 5 pairs of shorts that I patched. I won’t tell you how long those shorts have been waiting. What I will tell you is that they were hardly missed or there would have been a need to patch them a lot sooner. My husband has enough shorts to last at least 3 weeks without needing to wash them. Same goes for things like underwear. I tease him, because he has so many t-shirts that he could wear one each day for the next 10 years and still not need to do laundry, but I can’t change that and each time he leaves home for an air show or trip, he will always come home with a minimum of 2 new t-shirts. You get my point. Anyway, I finally got around to patching his shorts.

First up, a sheet – its side hem had come out. For this I used a simple straight stitch – that is about as easy as it gets. I back stitch as each end to ensure it won’t come undone. Now, I know the sheet pattern is dated, but any sheet I can patch to save is better than worrying about fashion. It will be used as a top sheet over the beds to help protect the better sheets from cat hair and other cat related things (fur balls!)

Next up was the shorts. The first pair needed the waistband re-attached. Fairly easy, but the stopping and starting at each belt loops slowed the process down. After I repaired the parts that needed it, I also continued around the waistband to reinforced the rest of it so we wouldn’t need to re-visit that anytime soon. I always go a bit overboard, but I was there and it went quickly and it was the right thing to do.

After that I focused on the other shorts. They all had rips and tears in different spots. Years ago I used the iron on patches and they would last a while, but not long enough. Then I used the zig-zag stitch in different lengths and widths to mend these things. This time I decided a few spots needed some additional reinforcing (like the one you see pictured on the left.) I grabbed a rag (used to be a pair of short) that had some good weight to it and would hold up to the patch as well as hold the shorts together for a little while longer. In fact, I think the patches will outlast the shorts now. Like I said earlier, I tend to go a bit overboard.
All the shorts are patched and put back on the shelf to wear. Some have been patched more than once. Those will be worn around the house while the others are still good to wear to work.

I am glad I have my trust old sewing machine. It has done well over the years with regular tune-ups and no repairs of any nature. After 30+ good years, I get a bit worried because most of the major parts are no longer available and a day may come when something major happens and it is not fixable. Well, I increased my odds…. I bought another one – same model and everything.

I found it at a garage sale. It works well and has been recently serviced. Whatever happens to my Dinosaur, I either have another one for parts or to use if it comes down to that. For $40 is was far less than a replacement machine would cost.

Click on the badge to go see what others are doing.

Do you find you use your machine a lot for patching things? Do you have any techniques you can share with me?

Sincerely, Emily

You can see what else I am up to over at Sincerely, Emily. The topics are varied, as I jump around from gardening to sewing to making bread or lotion and many things in between.

Read Full Post »

With all my traveling, sewing, soap making and present wrapping, i missed out on participating in much handmade holiday conversation here at Not Dabbling, so my post this week will be a run down of all the projects i worked on this year.

Check out An Austin Homestead in the next week or two to see all my projects revealed. You can also find all my original handmade holiday posts in the archives on the left sidebar.

I got started with my holiday gifts early this year, beginning in September with some canned blackberry jam made from berries i picked just down the road, blended with dried cayennes saved from my Austin garden.

While i harvested gobs of berries and sold veggies to folks at the local farmer’s market, i was inspired to make my own produce bags for use at market and at home. I played around with my crochet hooks and came up with a sweet and easy pattern. I made at least 6 of these to give to several family members as Christmas gifts. *And i’ll be posting a tutorial on how to make your own market bag soon- so stay in touch and crochet with me!

My spinning wheel was a big contributor to my gifts this year. Not only did i give some beautiful skeins of “meriboo” (merino/bamboo) yarn to my mother in law, i also spun the yarn for several knitting projects for other loved ones. One mother has a new scarf, one father has a new hat, and each sister has a headband or hat. I am especially proud of two hats i knitted for my two best friends. One is in Texas, the other in New York and thus one has ‘not so warm’ hat, and the other an extra warm hat made of handspun quivit fiber (musk ox). I don’t yet know how to follow a knitting pattern, so all my projects come out rather “uniquely” which makes them even more special: they’re the only ones like them!

Giving my handmade gifts filled me with so much pride this year. I think my recipients loved their gifts, and i could tell they were all touched by my truly ‘hands on’ experience with each of their presents. Whether spun then knit, or picked then canned: all my gifts started with me from scratch to become treasured and useful possessions that will hopefully remind my recipients of me whenever they taste, wear or use them. To sit down to spin yarn for a project for someone you love to enjoy for years to come: THAT is what Christmas is all about, Charlie Brown. For me, at least.

In these dark days after Christmas (and other gift giving holidays) and before the new year, what thoughts and gifts are you pondering – both given and received? What present (given or received) stands out in your memory as the most treasured this year?

Read Full Post »

I shared this on my blog, Unearthing This Life, earlier this week. I thought I’d pass it along for all of  you looking for a way to be crafty while (re)using thrift store purchases. Everything but the ribbon is vintage in this item. This was way more fun to design than purchasing something brand new! I hope you enjoy!!
pillowcase purse

This summer I picked up three or four sets of vintage pillowcases to make a few dresses for the Kid. I had originally intended to create a matching top for myself with the extra cases, but I thought it would be much more fun to create a new purse! Now I don’t claim to be any good at sewing. I’m much more of a free-form artist and sewing is so… final. So instead of digging up a pattern and trying to follow it, only to mess up and despise what I created, I decided to design my own pattern.

pillowcase purse

Once I decided which pillowcase design I wanted to use, I checked for any mending needs. If you’re like me, you have several old, worn out purses hanging around. So instead of purchasing a new handle I looked through what I had. (I have my eye on a few purses at the thrift shop just for their handles!)

pillowcase purse collage1

Next I played around with shapes for the purse. I folded the pillowcase and centered upon the design. I didn’t want a humongous purse that would fold under weight, but I wanted something big enough to carry what I consider my essentials. Think about where the pillowcase opens versus where your purse will open. My pillowcase opened on the “bottom” of my purse so I had to figure out where I wanted the top of the purse to be. Be sure to add an inch to the top for a rolled hem and a 1/2 inch to the bottom for seams and hems.

I was fortunate that I had enough “scrap” pillowcase leftover to make a liner for my purse. This is a must have if your pillowcase is older and the material is soft and worn. Because I didn’t want my purse quite as wide as the pillowcase I needed to trim it a bit. I wanted the purse 2-1/4inches narrower than the original pillowcase, but wanted to allow for a 1/2 inch seam, so I trimmed off 1-1/2 inches from one side. (I left the folded side of the pillowcase alone).

pillowcase collage 3

Once I trimmed down the pillowcase, I made a simple zigzag stitch on all raw edges to prevent running. Make sure to stitch the liner as well. If only because I can’t do anything simply, I decided that I did not want a plain rectangular purse. Instead I opted to blunt the corners of the bottom of the purse. Before I commited to a shape, I pinned the corners to get a visual. Three inches inward on both the side and bottom was pleasing to the eye.  I added 1 inch for the bottom seam, so only trimmed off 2 inches in either direction. Before going any further I made a quick zigzag stitch on these raw edges.

pillowcase collage 4

Next I sewed a seam on the bottom and bottom corners. Turn your purse inside-out so that you’re looking at the wrong side. Line up both edges of the bottom of the purse (and corners if you don’t want a straight bottom). Sew a straight straight stitch 1/2 inch from the edge on the bottom edge and up the open side. I sewed an extra seam 1/4 inch inward for additional strength. Next do the same with the liner. Iron seams open.

Now it’s time to stitch everything together. Insert the liner into the purse and turn everything inside-out so that you’re looking at the wrong side of the liner (If you look “inside” the purse you should see your design). Line up the top edges and make sure your sides match up as well. Roll the top edges of both the liner and the exterior down 1/2 inch and iron flat. Fold all the way around a second time (1/2 inch) and pin then iron flat. With matching thread, use a straight stitch to sew the hem closed 1/4 inch from the edge.

pillowcase collage 5

Now to finish up! Take some matching 1 inch ribbon and line it up with the hem stitching on the interior of the purse. Tack it down with some pins. If you want to incorporate your handles like I did, insert them underneath the ribbon, then sew the ribbon and handles onto the hem edging (don’t go all the way through to the exterior of the purse) with a needle and thread. I used some craft glue for additional strength. The ribbon hides all the handwork and the sloppy ends of these handles. If you’re using straps or handles with rings, sew the rings onto the interior hem edge (without going all the way through the purse) and then tack on the ribbon by hand to hide the hardware. Finally, make the purse yours! I added some iron-on sequins I happened to have in my craft box. It was the perfect addition and required no fancy handwork.

pillowcase purse

I’m absolutely thrilled with my new purse and I know I could not have purchased one brand new quite as cute!

pillowcase purse

Read Full Post »

Apron Sew-A-Long Part 3

Ready for part 3 of the apron sew-a-long?  Time to finish up those aprons and start wearing them!  If you missed any of the previous posts, you can find them here – part 1 and part 2.

Now it’s time to make the binding for the apron.  First lay your fabric and draw lines with a water-soluble marker 3.25″ apart (these will be your cut lines).

Photobucket

Line up pattern markings so you can cut one continuous strip once you sew binding piece in a loop.

Photobucket

Sew the seam to form a loop with your binding piece.

Photobucket

Cut on the lines you drew.  You will now have one very long piece of fabric that you will use for binding both sides of the apron as well as the neck and back ties.

Photobucket

Fold the binding, wrong sides facing each other, and press.

Photobucket

Open the binding and fold each side, wrong sides together, to the center fold crease.

Photobucket

Now fold along the center crease and give the binding a good press.

Photobucket

Now your binding is ready to attach to your apron.  First cut your long piece in half.  Now you’ll want to find the center of your apron side and center of your binding piece and pin it to the apron.  When you attach it to the apron, you’ll need to open one of the sides of your binding so the right side of your binding and the right side of your apron are facing each other.  Pin in place, then sew the binding to the apron only stitching on the outer crease line.

Photobucket

Fold the binding on the center crease and around to the back side, pin in place.

Photobucket

Now using an edge stitching foot, start at one tail of your apron strap and stitch until you get to the apron.

Photobucket

Keep stitching on the apron and then back off on the rest of the loose strap.  This step closes the ties and secures it to the apron.

Photobucket

Repeat on the other side and viola, you have your very own apron!  Pat yourself on the back and tie that apron on – you made an apron!

Photobucket

Here is my finished apron.  I love the stripes.

Thank you to all who participated in the sew-a-long, I hope you found it helpful.  I have enjoyed sharing a little about sewing with the readers of Not Dabbling in Normal.  I’ve decided to end my little sewing series.  School is starting in a few weeks and my family is traveling down a new-to-us path, we’ll be homeschooling our four children this year.  I’m super excited, but can only imagine I’m going to have even less time for writing posts.  I need to clear off my plate and make sure our school year gets off to a solid start.  Have a great rest of your summer!

Photobucket

Read Full Post »

Apron Sew-A-Long Part 2

Are you all ready for part 2 of the apron sew-a-long?  My apologies for not posting two weeks ago like I was supposed to.  We went camping and I forgot about my post – oops.  Love those long holiday weekends, but it messes with my mental calendar and makes me think that Tuesday is really Monday.

If you need a refresher of where we left off, please peek at this post.

Now that the apron is all cut out, we get to start sewing!  First up is tackling the pockets.  Remember I’m using McCall’s 2947.  The instructions for McCall’s 5358 should be very similar, but I didn’t check them out so I have no idea if they follow exactly.

On the front page of your instruction sheet you see the bottom is titled “Sewing Directions”.  It shows the first step is attaching the pockets.  I honestly don’t follow the directions exactly.  I do my own thing with pockets. You’re welcome to follow their directions of you can follow mine.  My are a little simpler and that is the beauty of sewing, you can construct things how you want to.

First I fold down the top raw edge of the pocket 1″ and press to crease.  If you use your eagle eye, you can see this is actually the top of the apron and not the pocket.  I went ahead and did the pockets and apron top in all at the same time (apparently I don’t follow directions very well).  So you might as well just press the top of your apron over 1″ at the same time as you’re working on the pockets and get that part done too.

Photobucket

Next you need to finish the raw edge so it doesn’t unravel in the wash.  If you have a serger or some sort of overlock function on your sewing machine you can finish the top edge of your pocket(s) and top of apron that way.  I chose to use my pinking sheer blade rotary cutter to treat these edges.

Photobucket

Next you stitch down the top fold so it stays in place on both the pocket(s) and apron top.

Photobucket

Photobucket

Set aside your main apron piece and we’re going to focus solely on the pockets.  You need to fold the remaining three edges to the inside using a 5/8″ seam allowance (aka fold your raw edges in so they measure 5/8″ on your little seam gauge ruler).  Press.

Photobucket

Now place your pocket(s) on the front of your apron using the pattern piece as a guide.  Remember the pattern piece is only a guide so if you like your pocket(s) placed differently (i.e. higher, lower, closer together, etc) do what you like.  Afterall this is YOUR apron! 🙂  Also a reminder that I made two square-ish pockets because I personally like two pockets.  This is the reason I sew, so I can do what I want. 🙂  When you have your pockets just right, pin them in place on your main apron piece.

Photobucket

The pockets are now ready to be stitched down.  For a professional look, stitch close to the edge of the pocket (about 1/8″).  I use my edgestitching foot as you can see in the photo.  The edgestitching foot makes it so easy to sew in a straight line.  My stitch length is a 3 on my machine.

Photobucket

Next stitch about 1/4″ away from your first stitch line again at a stitch length of 3.  If you used an edgestitching foot, you’ll need to put your regular foot back on before completing this step.  You’ll end up with two lines of stitching about 1/4″ apart.  This makes a nice, durable pocket.

Photobucket

Viola, the pockets are finished!

Photobucket

Let me know if anything is unclear, until next time…Happy Sewing!

Photobucket

Read Full Post »

Apron Sew-A-Long Part 1

Alright, does everyone have their apron pattern and fabric?  Well let’s get started!  To begin you’ll need either McCall’s 2947 or McCall’s 5358 and 1 3/8 yd of fabric.

My apologies if this is too elementary for some of you.  I want to make sure it’s easy for everyone to follow along and successfully make an apron.  If you’re a gung ho sewer, by all means blaze ahead.

So first, you need to cut out your pattern pieces.  I’m using 2947, so that was pieces 13, 16, & 17.  Actually you don’t have to use 16 which is a pocket.  There are a number of pockets which you can use in this pattern.  I chose 16 and actually cut the piece of fabric in half to make two separate pockets because that is what I personally like on my apron.  You can put whatever pocket(s) on you’d like or leave them off altogether.

Photobucket

Next you need to lay your fabric out.  Make sure you have it on grain.  You can see with the stripes it’s super easy to find the grain of the fabric.  Below is the cutting layout shown on the pattern instruction sheet.  Secure your pattern pieces to your fabric with either weights if you’re using a rotary cutter or with pins if you’re using scissors to cut.

Photobucket

Here is a close up of the grainline on the pattern matching up with the grain of the fabric.

Photobucket

Once you have cut out your fabric, it should look like this (remember I chose to cut the one big pocket in half to make two smaller pockets)…

Photobucket

Let me know if you have any questions.  Next time we’ll start the sewing process!  I’m really pleased with how my apron turned out, the stripes make it so fun and summery!

Photobucket

Read Full Post »

Apron Sew-A-Long

With the big holiday weekend coming up, I thought it would be a great time to get all our supplies gathered for our apron sew-a-long.  I know many of you might prefer something more frilly and girly, but honestly because this is supposed to be a beginning sewing project, I picked a very simple apron style.  I want everyone who participates to be successful and be excited about what they made.

You actually have two choices.  If you have a Hancock Fabrics nearby, the McCall’s patterns will be on sale this weekend for 99 cents.  Or if you don’t, I found an alternative that is the McCall’s Easy Stitch n’ Save pattern (regularly $2.99 low priced which you can buy at Joann’s, Hancock, Wal-Mart, etc).  The Easy Stitch n’ Save patterns are the same pattern with only a limited number of views.  Either way, you’ll be working with the same pattern.

The first choice is McCall’s 2947 ~ view F.  Click on the link and you’ll be able to see the line drawing – it’s the basic one with the neck ties the model is wearing.  This will be the one on sale this weekend for 99 cents.

The second choice is McCall’s 5358 ~ view C (the ones at the bottom of the picture).  This one is everyday low priced at $2.99 and is not in the pattern drawers, instead it’s usually on some sort of large rack or wall display.  If you can’t find the Easy Stitch n’ Save patterns just ask a store employee.

From looking at the information on the McCall’s website, both patterns are one size fits most.  You will need 1 3/8 yards of 45″ wide fabric or 1 1/4 yards of 60″ wide fabric.  Most fabrics you’ll pick will be 45″ wide.  Denim is typically 60″ wide, but novelty prints and quilting cottons are 45″ wide.  You can find the fabric width on the end of the bolt and when in doubt, ask a store employee for help.  The envelope suggests Cotton and Cotton Blends • Chintz • Gingham • Calico • Canvas • Denim • Polished Cotton for fabric choices.  And remember, all this information is on the back of the pattern envelope if you forget while you’re at the store.

So get your engines started sewers, we’re going to sew an apron!  We’ll start this in a few weeks.  What I plan to do, is post step-by-step and then you can follow along.  It will take a few posts to get the apron completed so no one gets overwhelmed by too much going on.  One last thing, don’t forget to get thread and needles for your machine when you’re at the fabric store and also please prewash your fabric.  If you have any questions, post a comment so I can address it.  Hopefully I’m not forgetting anything obvious.  Have a great Memorial Weekend – I hope you all get to enjoy some nice weather! 🙂

Photobucket

Read Full Post »

Today we’re going to go a little more in-depth into how to read a sewing pattern.  As outlined in my last post, there are three basic types of sewing patterns:

  1. envelope patterns
  2. magazine patterns
  3. pdf/download patterns

For simplicity’s sake, I’m just going to discuss how to read an envelope sewing pattern.  These are the most common pattern type (at least in the US) and can be purchased very easily either through your local brick and mortar sewing store or online.  Overall they are probably the most user friendly patterns to use too.

As shown in my last post, the contents of an envelope pattern will include the pattern instruction sheet and pattern tissue with the pattern pieces printed on it.

Photobucket

Another refresher of what the front of a pattern sheet looks like.

Photobucket

So what exactly is included on the pattern sheet you might wonder.  For a novice seamstress, all the information presented on the instruction sheets will probably look a bit overwhelming.  Those huge sheets include all the information you’ll need to successfully construct the patterns included in the envelope.  Elements of the pattern instruction sheet are:

  • Pattern brand and pattern number – the is helpful so you can find all the parts and pieces when you’re finished sewing the item and make sure they stay together.  There are many a times I’ve had pattern pieces from different patterns all over my sewing room so this definitely helps ensure things get back to the right envelope when you’re done.
  • Line drawing or sketch of the front and back of all the items included in the pattern – this just gives you a concrete idea of the shape of the item you’ll be sewing.  It’s particularly helpful when an item is presented on the pattern envelope in a print or dark colored fabric.
  • Line drawing or sketch of each individual pattern piece including the name of the piece, what views the piece is used in, and it’s corresponding number.  The pattern pieces are only referred to by number in the cutting layout and instructions so, you really need to know this information.
  • General directions about the pattern.  This area explains what all the symbols mean – i.e. what a grain line is, what notches look like, where the center front is, etc.  It also explains the cutting and marking process and the general sewing instructions you’ll need ( i.e. the seam allowance used, how to trim seam allowances to reduce bulk, etc.).
  • A cutting layout so you maximize your fabric yardage.  This shows you exactly where to place the pattern pieces on your fabric.
  • Step-by-step instructions to make all the items in the pattern envelope.  The instructions start with the first garment and progress through.  Several items might be similar and use the same instructions.  This is why it’s so important to read the instructions and look at the pictures before you start.

While it might sound like too much information, I can’t express too strongly how important it is to read all the instructions before you even cut out your pattern pieces.  This truly will help ensure your success.  Also, highlighting the pieces, cutting layout, and parts of the instructions that pertain to what your sewing will help you a lot.  And when in doubt, pull out your trusty sewing reference book to look up a term you’re not familiar with or to guide you even more if you’re unsure about a particular step.

Once I get through all this sewing basics series, I think it would be terrific to have a sew-along of a simple item such as an apron.  That way we can look at everything step-by-step and make something everyone will be successful at and that will fit (garment fitting is a whole different species and is a very common killer of sewing excitement).   Please chime in if you think having a little sew-along would be something you’d like to participate it.

Photobucket

Read Full Post »

Sewing 101 – Patterns

First off I want to say a heartfelt thank you to everyone who posted a comment last time.  You all sure know how to make the “new girl” feel welcome! 🙂

Photobucket

This week I’ll be talking more in-depth about one of my favorite aspects of sewing – patterns!!!  That is the time when I start to dream of my closet being filled with all sorts of beautiful garments.  Plus they are a cheap thrill for me when the chain fabric stores have them on sale for $1.  Honestly I can’t think of a better way to spend a buck (move over BK dollar menu!!! LOL).

Sewing patterns come in several different formats.  The one you’re probably most familiar with are envelope patterns.

Photobucket

Envelope pattern are readily available in sewing stores all across the US and Canada.  They are found in big cabinets or on racks.  To shop for these patterns you can either cozy up with the thick catalog at the store or shop the manufacturer’s website 24/7 (i.e. in your pj’s!).  Personally I do both, but I like the catalog better because I’m just a hands on kinda girl that way.

In the above picture you can see a variety of pattern companies who offer “envelope” patterns.  When you shop at your local chain (i.e. Joann’s or Hancock Fabrics), typically you’ll find Simplicity, McCalls, Butterick, Vogue, New Look, Kwik Sew, and Burda.  Your store might not carry all of them (I think Joann’s doesn’t carry Kwik Sew at any of their stores, but Hancock Fabrics does).  Some specialty fabric stores also carry independent patterns such as Jalie (a personal favorite of mine).

Photobucket

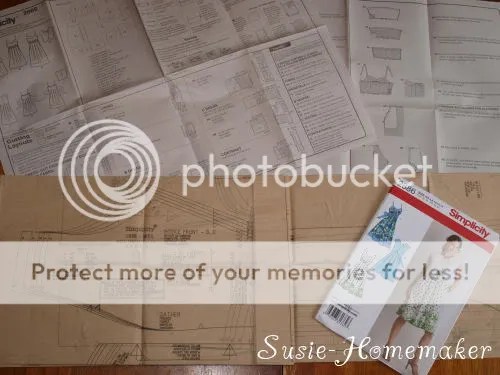
When you purchase an envelope pattern, included in the envelope is the pattern instruction sheets and pattern tissue with all the pattern pieces you’ll need to sew the item(s) shown on the envelope.   The envelope itself also contains very important information.  The front has the pattern photo and the back gives you a small line drawing, suggested fabrics, notions you’ll need, amount of fabric needed for the garment for each size, and also finished garment measurements.  Lots of very important information you’ll need to know during the sewing process.

Photobucket

The pattern instruction sheets are the road map for sewing the pattern.  They tell you just about everything you need to know.  As you can see in the above photo, it shows the line drawing of the garment, what pattern pieces are included on the pattern tissue, the general instructions you’ll need to know for sewing the pattern, a cutting layout to ensure you get all the pattern pieces on your cut of fabric, and then the actual directions for sewing the pattern.

Another type of pattern is the downloadable pattern.  You can find PDF patterns for all sorts of garment and craft items on Etsy, eBay, blogs, as well as websites such as You Can Make This and Burda Style.  The price varies from free to a few dollars per pattern.  A search in Google will surely get you started in the right direction.

PDF patterns include both the directions and the pattern pieces you’ll need.  You print the entire document on your home printer using 8.5″x11″ paper and then tape the pattern pieces together.  It’s very easy and something you can download in minutes, however they can consume a lot of paper, tape, and ink if it’s a big pattern.  Another thing worth noting is a lot of PDF patterns include color pictures mixed within the directions to walk you through step-by-step.  This is a great option for newbie sewers because of the extra directional help.

Photobucket

Lastly, another fun option is pattern magazines.  Published all over the globe, these little gems are a fashion magazine with the patterns included!  I adore pattern magazines.  It’s fun to see the fashion side of things and then know I can make up the garment because the pattern is included in the magazine.  Also it’s a fun treat when they are delivered in my mail box.  They are more expensive than buying an envelope pattern on sale at the local fabric chain, however each issue includes a hug array of patterns (typically about 40 in most magazines) so the value is much better per pattern.

Shown in the above photo are:

  • Ottobre (six issues per year in English – two women’s issues and four children’s issues)
  • Burda Style magazine (12 issues per year in English)
  • Patrones (12 issues per year in Spanish – two issues are for children)
  • KnipMode (12 issues per year in Dutch)
  • Modellina (three issues per year in Italian)
  • La Mia Boutique (12 issues per year in Italian – also published in French under Ma Boutique)

Now you’re probably wondering how all those patterns can fit into one magazine issue.  May I present to you, the “road map”!

Photobucket

Well actually it’s not a road map, but it sure looks like one.  Shown is one side of a double sided pattern sheet – typically there are about four sheets (or eight sides total) included with each magazine.  All the colored lines and numbers denote the pattern.  It looks very overwhelming and confusing at first, but by the time you finish tracing your first pattern you see it isn’t actually too bad.

To trace a pattern you’ll need some sort of tracing medium.  I personally use a product called Pattern-Ease found in the interfacing-by-the-yard section of Joann’s, but you can use tissue paper, medical exam paper, drafting paper – basically anything transparent enough you can see through to trace.  One last little tidbit, when tracing patterns you have to add seam allowances to the pattern.  I remember feeling like this was a pain, but now I prefer being able to decide how large of a seam allowance I want.  On a garment using knit fabrics I usually only add 1/4″, but on a garment that uses woven fabrics I add 3/8″-5/8″ depending on what I’m making.  A simple ruler will help you do this with ease.

Photobucket

In the photo above is an example of what pattern magazine instructions look like.  Just like pattern envelopes instructions, they give you all the pertinent information you need to sew the pattern (i.e. type of fabric, how much fabric, notions, what pattern sheet to trace, and written directions to sew the pattern).  One downfall for beginning sewers is pattern magazines are only written directions and no pictures to guide you.  This can be very hard for some, but with a little practice and starting with a simple garment, you really should have a good sewing experience.  This is where your basic sewing book comes in handy too!

I hope I haven’t overwhelmed you with all this information.  Now go peek at some pattern catalogs and get yourself excited to sew! 🙂

Photobucket

Read Full Post »

Older Posts »