Feeds:
Posts
Comments

Archive for August, 2009

Using up green tomatoes

We pulled our tomato plants out this past week. Both age and a small bit of blight were effecting them and they needed to go before the blight could spread. We got a great harvest from our tomatoes this year and other than a few disappointing varieties (one variety split open 9 out of 10 tomatoes) we are very pleased. I know that many people did not get such a harvest because of late blight this year so we were definitely one of the lucky ones.

As we pulled those plants out though they still had a number of green tomatoes. Some had quite large green tomatoes still but blight was slowly decaying their stems so they could not wait on the vine any longer.

What to do with all those green maters is a question each year. My husband and neighbors like them fried. I saw a good recipe earlier this year some where with fried green tomatoes with a cherry tomato salsa on top and an added basil “paste” on the side (not pesto exactly but a paste of some sort that most of us can surely figure out in our minds eye).

Beyond fried my preference is for green tomato bread and butter pickles …with onions in there. They are actually my favorite way and so I no longer grow cucumbers since I think the tomatoes make, what I consider to be, a better pickle. However…I still have enough jars left over from last year so I had to find some new ways to use the greens. I came up with the following recipes. There are a number of versions on line and these are fairly common if you know about them. These are as I made them.

Try some of them out…I have on our family and friends and everyone liked all of them.

Hopefully no matter the weather most of you will get at least a few green tomatoes to try out one or two of these recipes.

*As always with canning recipes please read and understand how to can and know your altitude for appropriate time changes to these sea level canning directions.

GREEN TOMATO JAM
(excellent on chicken sandwiches or as a side to meat. Also good with bread)

1 1/2 pounds of green tomatoes with core, stem end and seeds cut or dug out then diced –don’t worry about skins as they will blend right in and not be noticed.
2 3/4 cup granulated sugar
juice of one lemon
2 inch piece of ginger, minced

*other options are cinnamon, allspice, vanilla….play with a few batches and find the one(s) you prefer.

Combine all ingredients in a heavy medium saucepan, Bring to a boil over medium heat, stirring often. Reduce heat and simmer, stirring occasionally, until mixture has consistency of thick jam, at least 1 hour . Process in boiling water bath for 10 minutes or store in refrigerator.

Green Tomato Marmalade

1 lemon, thinly sliced and seeded

2 1/4 pounds green tomatoes

3 1/4cups sugar

Bring lemon slices to a boil in a pot of water. Drain. Combine all ingredients in a saucepan along with 1/4 cup water, and bring to a simmer, stirring, to dissolve sugar. Cook at a bare simmer until tomatoes and lemon slices are translucent and syrup thickens. Process in boiling water bath for 10 minutes or store in refrigerator.

Green Tomato and Jalapeño Jam

4 jalapeños, stems & seeds removed, sliced
1 to 2” section of ginger, chopped (based on your liking for ginger)
3 cloves of garlic, smashed
½ cup cider vinegar
2 tbl soy sauce
1and 1/2 lb green tomatoes (cored,seeded and chopped)
3 cups sugar

In a blender or food processor, blend the jalapenos, herbs, ginger, garlic, soy sauce and cider vinegar till smooth. Add the mixture to a heavy bottom pot with the sugar and tomatoes. Place on the heat, bring to a simmer and cook on low till glossy and thick. Process in boiling water bath for 10 minutes or store in refrigerator.

Green Tomato Chutney

(excellent as a side to grilled pork this is one of my new favorite recipes)

Ingredients:

2 1/2 pounds firm green tomatoes, about 6 cups diced

1 cup raisins

1 cup chopped onion

1 1/2 cups light brown sugar, firmly packed

1 teaspoon salt

1 1/4 cups cider vinegar (authentic recipes use malt vinegar also)

1 to 2 inch piece of chopped ginger

Hot pepper to taste. Use either dried or fresh. Take a sample..let it cool…then taste and adjust during cooking.

*this recipe doubles or triples easily.

Trim the stem and blossom ends from tomatoes and cut into 3/4-inch dice

Combine all ingredients and bring to a boil. Reduce the heat and cook until thickened. This can take from 30 minutes to an 1 and ½ depending on how thick you want it.
Spoon chutney into hot sterilized jars, leaving 1/4-inch head space; wipe jar rims. Process for 15 minutes in boiling water bath.

Good Luck all and happy canning 🙂

Read Full Post »

My grandmother used to say, “Everything has a place and everything in its place.”  I hated hearing it growing up as I was a messy child, but I began to understand the wisdom in that sentence when I started running a home of my own.  I see the value in this bit of wisdom working in my life every day.

“Everything has a place.”  I’m learning that if something doesn’t have a place, maybe I don’t need it.  Honestly, if a possession can’t have a home, a place, is it important?  These days if something is important, something I want to keep, I find a place for it, even if that means getting rid of something else.  Everything should have a place and in my home, that place is not sitting on the kitchen table or on the floor – it needs to have a place that is accessible, easy to find, and a place that fits the possession.  For example, if I need/want a mandolin to make my kitchen prep work easier than it has to have a home in a cupboard without being buried by other kitchen utensils.  If I can’t find a place for it easily, I either need to cut back on some other possession or forgo the mandolin until such a time that I can find it a place.

“Everything in its place.”  If I’ve done a good job of giving everything a place of its own, than those things should be in that place and easy to locate at all times.  That means the mandolin is in its assigned place in the cupboard, the vegetable peeler is in the second drawer under the coffee pot, the bottle opener is magneted to the side of the fridge, etc.  If I’m having trouble keeping things in their places, I consider if that place is the most appropriate or if I need to do a little purging to make it fit into is place better.

Despite keeping things neat, the greatest wisdom behind this little nugget from grandma is its effect on time management.  If I have everything in its place and I know where those things and places are located, I save tons of time.  I don’t have to look for things I need when I’m canning peaches or making dinner or trying some kind of home repair.  I know where the phillips screwdriver or hammer is, without having to think about it or digging behind 10 bowls, 2 food processers (that I don’t use), a popcorn maker, and serving platters.  If everything has a place and is in its place, I can move around without stopping and quickly move through my tasks.

There are times, of course, when I fall short, but that is rare these days.  I make sure to use things, clean them, and put them back in their place without thought most of the time.  Its a habit that serves me well, and allows the house to run a bit more smoothly.  If you’re finding it difficult to find things, why not give grandma’s “Everything has a place and everything in its place,” philosophy a whirl.  If it doesn’t work for you, you can always change methods to something that does.

Read Full Post »

bunch of tomatoes

All I can say is my oh my do I have tomatoes…planted 40 plants

WHAT was I thinking???

They looked so little when in their tiny starter cells.

So what to do with all these?

How about raw tomato sauce

Raw? Why raw you are wondering…

Well here is the deal, I have recently become vegan…but this has nothing at all to do with that!

So no I am not a raw food vegan…

I am a lazy vegan….as opposed to a lazy vegetarian which I perfected over decades of hardly working!!!

I just don’t want to stand around a big pot all day cookin’ up sauce so…

tom crate3

I decided that lazy was the word for the day I would make the sauce raw…

Why not I said to myself…there is no law stopping me.

So that is precisely what I did!

tomato sauce1

First I washed…

Then I cored…

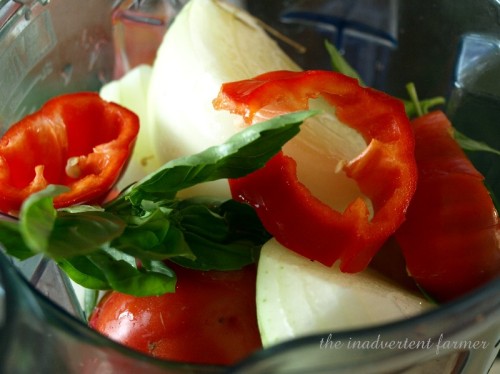
Then I threw…I threw them into my Vita-Mix that is!

Then I added…

pepper4

Part of a pretty pepper from my plot…say that 3 times fast!

To which I also added…

tomato sauce2

Fresh basil, part of a sweet onion…

Parsley from my window sill…

Salt, pepper…

Roasted garlic…I LOVE roasted garlic!

If you put something roasted in your raw sauce does that not make it raw anymore?

And a touch of organic extra virgin olive oil.

Whirred it all around and voila’

Fresh, raw, yummy tomato sauce…

Which I forgot to take a picture of…sorry!


We have used this on pasta

Over roasted eggplant

As chilled soup

As tomato juice with a dash of Tabasco!

And of course with as many tomatoes as I have…we froze A LOT!

I must say it is scrumptious…is it exactly like cooked tomato sauce…no

But it beats standing around a big ol’ pot in the middle of August!

Go… enjoy…

Eat!

Read Full Post »

100_4828.1

It seems like I was just fretting about planting the garden, and now it is frenzy of harvesting and preserving.  But in the back of my mind on these cool nights, is that fall isn’t too far off and winter will be here before I know it.

I plant a variety of cover crops, and I plant them in succession too, just to fit them in with existing crops. 

Cover crops can serve many purposes.  They help build organic matter, hold the soil during winter rains, leave residues that can choke out problem weeds, and fix nitrogen in the soil.

The downside of cover crops in the home garden is that they can be hard to incorporate in the soil the next year when you are itching to get the garden in!  There should be at least 3 to 4 weeks after tilling the cover crop in before most vegetable seeds and plants are planted just to make sure the cover crop has properly broken down and it’s allelopathic properties are no longer present.

Another downside I have discovered the hard way, is that most cover crops become a reliable food source for deer and elk in the winter, and provide cover for voles that like to eat my roots crops.  However, if you have those critters under control – don’t let my mis-management sway you from using a cover crop.  Each gardener has to do the pro and con list to find out what works the best for them in their conditions.

The most popular cover crop is annual or cereal rye.  It is cold hardy and while it may remain short and dormant during the coldest of weather, once the weather breaks it will take off like gangbusters.  Often rye is planted in conjunction with Hairy Vetch or Austrian Peas which are both cold hardy legumes that will fix nitrogen.

Winter killed cover crops such as Oats or Field Peas work well in home gardens because they make some growth in the fall, and then are killed by frost, leaving a mulch behind that will hold the soil through the winter, but will be easy to incorporate in the spring in a home garden setting.  Sudan grass or Sudex is also useful and winter-kills reliably even here in our mild Pacific Northwest winters.  However, it can be toxic to livestock if grazed when it is frosted, for that reason I don’t use it.  But, if you don’t have livestock – go for it.  Sudan really can break up hardpan and suppress weeds.

All in all I would say cover cropping is a necessary skill to add to your gardening repertoire.  What cover crops work well in your area?

Read Full Post »

a lot of people become intimidated when it comes to herbs because they don’t know where to start. most are familiar with the more commonly used ones such as echinacea and st. john’s wort but what a lot of people don’t realize is that they have a whole arsenal of medicinal herbs in their spice cabinet: garlic, rosemary, thyme, sage, fennel, dill and anise seeds, lemons and turmeric are a great start. pull out some salt, vinegar, olive oil and honey (raw) from your cabinet and you’ve got the makings of a first aid kit worthy of treating winter ailments! throw in some vodka or brandy and you can make a full spectrum of herbal remedies.

garlic: natural antibiotic, broad spectrum which body/germs don’t build a resistance to allowing it to be used over and over again. useful for helping to fight off bacterial infections, earaches and other wintertime ailments such as strep throat. can help to reduce span of illness. best raw (but take in small doses as it can irritate in large). can be heated in oil to make eardrops or infused in honey and eaten to help with sore throats, etc. tinctured in brandy or vodka, it can be taken as needed (15-30 drops at a time depending on body size) to help.

to use in oil: crush garlic cloves, place in double boiler with olive oil and gently warm for 2 hours. strain and add a few drops in both ears to treat earaches and infections.

to use in honey: crush garlic cloves, place in mason jar of preferred size and fill with raw honey. allow to steep for at least 1 month. eat a spoonful as needed. the cloves can be eaten too.

rosemary: rosemary essential oil has been tested for use in effective against colon, breast and lung cancer with promising results. it is an antiseptic and is great in tea form. it can smooth the muscles of the digestive tract, helping to calm stomach cramps as well as menstrual cramps. as an infusion, it relieves digestive problems, relieves cold symptoms, and helps as an expectorant.

thyme: great for the respiratory system. thyme is excellent for coughs and sore throats. it has antiseptic and anti-fungal properties. it can be used externally as a wash to cleanse wounds. it makes a pleasant tasting tea and is helpful for bronchitis and whooping cough/pertussis. when our family was going through whooping cough this summer, a tea containing thyme was drank in copious amounts to help.

sage: a sage/salt water gargle for sore throats. it is also known as a diaphoretic which means it will increase perspiration. use with caution if breastfeeding as it can decrease the milk production (helpful if mama needs help with adjusting her milk flow though).

fennel, dill and anise seeds: great for digestive problems. seeds can be chewed before and after meals to help settle the stomach. a tea can be made and drank during meals to help with digestion as well.

lemons: an excellent form of vitamin c. a drink made from 1/2 lemon, 1 tablespoon of honey and 8 oz. of hot water helps to soothe a sore throat. when lots of mucus is present, oranges should not be eaten because they can increase the amount of mucus in the body. lemons provide a great source of vitamin c w/o increasing the mucus.

turmeric: excellent when used in a honey paste for sore throats.

turmeric/honey paste: mix equal amounts of honey and turmeric well and eat. i start with 1 teaspoon of each. after about 3 doses (usually taken w/in an hour) i have always had much relief. this is the first thing i reach for when my throat feels scratchy.

salt: add to water or herbal infusion to make a gargle for sore throats. heat in a pan on the stove and place in a handkerchief (tie opposite corners together tightly to keep salt from leaking out) and place on aching ear for extra soothing power when using garlic oil drops.

vinegar: herbs can be infused in vinegar and added to salads to help with calcium absorption. any herb can be used to increase health benefits as needed.

olive oil: infuse herbs by crushing herbs and adding with olive oil in a double boiler and slowly infusing over low heat for a few hours (or placing in a mason jar and setting in the sun for 2 or 3 weeks). oil can be used as a massage oil to relieve muscle cramps, rubbed on the stomach to relieve stomach cramps, ear drops to relieve ear aches, ear infections and swimmer’s ear (infused with garlic or onions) or combined with beeswax to make a salve.

honey: honey in itself has terrific medicinal powers. infusing herbs in it can make herbal medicine yummy, especially for little ones who aren’t so crazy about herbs. it can be made into a syrup by combining 1 part herbal infusion to 2 parts honey, warming briefly on the stove to combine and bottled. add 1/2 part brandy to help preserve and store in the refridgerator. pastes can be made by adding equal parts of honey and powdered herbs. adding more herb can make a dough that can be rolled into balls and and dried.

these are just a brief synopsis of herbs that you can find in your kitchen that can help with ailments. try googling some herbs in your cabinet by typing the word ‘medicinal’ and the herb to see what you can come up with. you will be amazed at what you can do with what you’ve got!

Read Full Post »

A Little About Cornbread

After my last post a few weeks ago, we joked in comments about the passing around of cornbread and how I might write a recipe in my next post. Even though I don’t have an extra special cornbread recipe, I have certainly cooked enough of it and eaten enough of it to share a few things about it.

The most basic of cornbread recipes is simply corn meal, salt, and water. After scrambled eggs, this is probably the first thing I learned to cook myself. We mixed this together to a lumpy pancake batter consistency and fried it, like pancakes, on top of the stove. Even when times were very lean, we always had cornmeal which meant we always had something to eat. I remember many very filling meals of cornbread served along side dried beans cooked with salt pork. Even today, this meal could be had for pennies per serving.

I use the same basic recipe for plain cornbread that I think most people use, whether they measure or not. If you find yourself in a pinch without a recipe, the one printed on the bag of corn meal will serve you very well. I use the following:

¼ cup of oil (vegetable oil, shortening, lard, or bacon fat)
2 cups of self rising corn meal mix (corn meal mix is different from plain corn meal!)
1 egg, slightly beaten
½ to ¾ cup of milk (some people like buttermilk, but I don’t)

Mix all together, pour into a greased 8 or 9 inch pan and bake at 400 for about half an hour.

To get it just right, it’s best to do it like this:

Preheat the oven to 400 degrees F. Get your iron skillet and place it on the stove on low heat. Scoop out a big, heaping tablespoon of lard and put it in the hot skillet. While the lard melts, dump two cups of corn meal mix into a bowl. Break an egg into the bowl and stir the egg, by itself, until it’s lightly beaten. Add half a cup of milk. By this time, your lard should have melted in the pan. Pour the melted oil into your bowl and place the skillet back on the stove.

Pinch up a teaspoon or so of dry cornmeal mix (from the bowl or the bag) and sprinkle it around in the hot iron skillet. Let it brown a bit while you stir your cornbread batter. The batter should be somewhat lumpy and runny. You can add a little more milk if it seems too dry. It should be somewhere between pancake batter and cake batter. Either way, you’re committed by this point, so just pour the batter right into the hot skillet!

Move the skillet to your preheated oven and bake for 25 or 30 minutes, or until the top is golden brown. My grandmother’s official test for doneness was to pull the skillet out of the oven, press the top of the bread down gingerly with her hand, and if it sprung back, it was done. Then, she moved it to the broiler for a little additional browning on top.

For a nice crusty bread, I can’t recommend anything over a heavy iron skillet. I have just recently inherited one of the skillets my late grandmother used to make cornbread 30 years ago. You can see the knife marks where the bread was cut into squares. This significance of a square pan is that you get 4 corner pieces—each of which has two crusty sides. My cousins and I would race to get the corner pieces!

Grandma's Cornbread Pan

Grandma's Cornbread Pan

Besides being so inexpensive, another great quality of cornbread is its versatility. Aside from eating it as the bread part of a meal, it is also delicious crumbled hot or cold, with milk poured over it as a cereal. It can be split into two pieces (like slices of bread) and dressed with mayo and thick slices of ham or bacon—a great breakfast on the go for us country types. It can be spread with butter and topped with jelly, honey, or oh-my-goodness thick chunks of pear preserves! It can also be crumbled into soups, stews, or chili.

It’s not surprising that cornbread is common wherever in the world corn can be grown. It can make a meal all by itself.

Read Full Post »

DeepFriedOlives

Take pitted green olives; pipe some mashed seasoned goat cheese into where the pit was; flour them, egg them, crumb them (mix a bit of Parmesan mixed into the breadcrumb mixture); fry them in, yes, olive oil. Let them cool a little while before letting yourself pop one into your mouth to enjoy the burst of warm, wet olive flavor. They go fantasically with goat cheese, crackers or a nice home made crusty bread, and a hearty wine!

Read Full Post »

Soil is an extremely important “product”  as you surely know. I don’t care if you have thousands of acres or just one—-you must have good soil to have good health and good products. Not only does it make the vegetables or animals harvested taste better and be better for us it also can reduce or eliminate some work since disease and insect problems will be reduced or eliminated (depending on disease and/or pest of course).

Like most people we have had to work at improving our soil for the entire time we have been on this property. We did not get lucky enough to purchase perfect, organically cared for fluffy top soil. Not one drop of it.

Our property was not in very good shape when we first arrived since the previous owners rented the land to the neighbors for commercial beef and stripped off most of the trees (and top soil) AND strip contoured the ground for erosion control (the type of control now deemed very detrimental to soil and erroneous in the extreme). And though it still has room for improvement after all that hard use, we have been working very diligently at making it better and it shows. One thing that has been a “hitch in our get along” is the cost and convenience of finding some items. We are…and always have been, organic. In my area organic is still “out there” in the farming community and our local (and most not so local) mills carry only chemical versions of all amendments. Bummer.

So…we have had to think outside the box when it comes to improving our pastures beyond normal lime and a few other common amendments found everywhere. It is one thing to spend lots of money on kelp, green sand, bagged natural sources of phosphate and other needed amendments for your vegetable garden but it is much much harder when it comes to acreage. If you have one or two acres maybe it’s not so bad, but when you have more to cover it can be quite pricey at many hundreds of dollars per acre more than even conventional amendments are. Unless, of course, you really are a “hobby farmer”.

Of course each area is different and some organic amendments may be cheaper in your area. Obviously if you live in say… Maine…. kelp will be cheaper, but in my not very organic area and you don’t generally find the items organic gardeners need unless they ship it in (adding freight costs) or it is purchased in small home gardener 5 pound bags.

However, if you are like us and either live in an area with a low organic philosophy or have limited money to spend (or both) you can think outside the box like we have. And no…the ways I will list are not the do all end all of ideas, just some of our better and easier choices. We have tried many many things to improve our soil and not all have shown us results. At least not highly noticeable results. I will not list those since I would like to stick more with something that will absolutely work and not with things that are still theory, or were low yielding, here on our farm.

One thing we tried to improve our soil was to make movable feeders to feed our hay  in every single day to our animals  (For years! And sometimes it was very tedious!!).  Beyond using the feeders we would also at times lay the hay on the ground if the area was clean –as in no manure recently there. We would of course move the spot each day, whether in the feeder or laid on the ground, feeding only enough hay for that day. We moved each not by just over a few feet either….we don’t want health issues of course. We would move the hay over by 40 or so feet eventually coming back and filling in the gaps. * Part of the reason for only feeding a day or two worth in a movable feeder was that we are very very hilly here and often had to move it by hand. 50lbs of hay still not eaten can be quite heavy to haul up a hill in a not so light feeder to move it out of a soggy manure filled spot in the rain*

Now as you wonder why we did this let me explain we had some “pastures” that literally had almost no top soil and grew only the rankest of weeds. To have skipped these spots and never grazed an animal there would have been defeating the ability to ever use them and as mentioned…money was an object on our farm. I would also like everyone to remember a quote that I read at one time. I can not remember it exactly so please excuse my misquote, however it went something like this: “Buying in feed and hay is like buying someone else’s land” (Off subject for a moment you can think of that even to the extent of toilet paper, cereal boxes, cotton clothing and on and on—every bit helps if you make a way to use it) So anyway… keeping that in mind we spread other people’s land all over our pasture….again and again and again. Using their land in the form of hay and feed to build our soil. Through rain and wind and bad and good weather….we spread and spread and spread. We also spread our livestocks manure at the same time since every place we fed them…they would poop and pee right there.

Another thing we did to improve our soil was to condense our animals into groups that more heavily utilize the grass we did have instead of being able to spread out and pick and choose where they would like to eat. You know that type of grazing…that perfect spot all animals go back to over and over to eat until they kill it off. And instead of explaining this concept myself I am going to send you to Throwback at Trapper Creek because she does a fine job explaining it in a recent article here. (She aka Matron of Husbandry also writes for us her at NotDabbling as many of you know).

Beyond reading the article I would like to say if you raise livestock and have never discovered the “magazine” Stockman Grassfarmer….do consider purchasing it. You will learn TONS of good things about grazing livestock (they do not advocate grain usage) soil fertility, improved grazing, livestock handling and all types of things you could not have imagined you needed to know to own animals. Mostly it is about cattle but there are often articles about pigs, chickens, goats and sheep. Even if you own just two goats…and one acre…consider it a subscription. Better yet if your just into healthy food—read Stockman Grassfarmer and understand good ways that people grow healthy food and help spread the ideas around to others. You’d be surprised at what you can learn even from something that doesn’t SEEM like it relates to your life. However…we all eat and so how our food is raised does affect us all.

Lastly (for this article anyway), one thing that has been a problem for us is fertilizing our pastures. Not adding top soil per se..but just plain old nitrogen. We have known we needed nitrogen on our pastures for a while. One sure way to tell even without a soil test is if you can see where your larger livestock have urinated. You know..those roundish looking spots that are slightly, or immensely, more green than the surrounding grasses? We have considered many many ways…some too much work and others really either too expensive or beyond our ability since we don’t own a tractor large enough to do some of the “scut” work. We do live in an area heavy with chicken houses but most houses (beyond the fact that they are NOT organic and feed medicated feed to the birds every day) are contracted out to larger farmers or commercial enterprises before the chicks are even installed in the house. So…no manure for us even if we were willing to overlook some of the chicken house “issues”. And let me tell you….when you get desperate you sometimes will settle for things you might not consider other wise.

We also considered raising our own chickens in movable chicken pens ala The chicken tractor book or Joel Salatin…but we did NOT want to hassle with marketing the chickens. Blah! Too much work!

Recently though a friend of ours…who aspires to some day own his own farm….decided to do a chicken tractor. He successfully raises, butchered and sold almost all of his hundred birds (there were a few losses but it is to be expected) from just his slightly larger than normal size back yard. He’s in the country with very accepting neighbors which is how he got away with this on a smaller yard.

Anyway, after seeing his success, and hearing him lament about space, we said “hey…use our pastures. No charge.”

He feels he is getting the better deal.

We KNOW we are.

Even by chemical fertilizer standards we are getting about a $450 per acre return based on cost in our area.

With two pens installed on our property and those birds pooping out loads of manure and other people’s property (they do have to have food beyond just our grass) we are getting exactly what we needed for no money and no required work on our part. Yeah 🙂 Oh yeah, we do supply a bit of water—but that is quite low compared to what we could be paying.

You can see a picture of some of the birds below.  Compared to those chicken house birds in the countryside around  us — these happy, healthy, pooping birds that are doing a fabulous job here on my pasture improving my soil and fertilizing it at the same time.  They are enjoying the summer weather and the occasional insect dumb enough to chance going into their cage— really…there’s nothing to compare. I know which one I prefer and appreciate.

So..if your in a bind like we are remember there are lots and lots of ways to improve soil matter and fertility that do not require chemicals or super high costs. Or even a tractor. Yes…it can be a bit of labor but then hey: You didn’t decide to raise livestock or be a farmer because it was a low labor job after all !

Have a great week everyone 😀

chickenschickensupclose

Read Full Post »

I’m in the middle of food preservation season in a big way, I’m sure I’m not alone in that.   In addition to our food preservation needs, I keep my gift giving needs in mind as well.  See, I think home canned or dehydrated foods make excellent gifts so I try to make extras of things we use regularly as well as can up a few specialities for my gift giving needs. 

I keep a small cupboard full of items specifically for gift giving.  I keep a few jars of brandied fruits, pickles, sauces, jams, dried fruits, etc. ready for quick gift giving.  I find that a few jars with just a little something else (baked goods or craft item) in a basket or bag make a welcome gift for any occasion: birthdays, holidays, even get-well gifts.  I also keep purchased items in this gift cupboard – books I find for someone specific, handmade items that I’ve finished, etc.

When its time to get the gifts ready, I secure a piece of fabric with a rubber band around the jar rim, cover the rubber band with a bit of ribbon, and add a tag.  This allows me to keep my rings for re-use and makes a lovely presentation.


The great thing about thinking and planning like this is that I can avoid last minute (& usually expensive) gift shopping.  It also means that I can give everyone just a little love in the form of something home cooked.

Some food items I’ve already gotten ready in the gift cupboard:

Some food items I’m planning on adding to the gift cupboard:

Do you have any regular things you make for gift giving that you’d care to share for my gift cupboard?

Read Full Post »

Pushing Potato Pots!

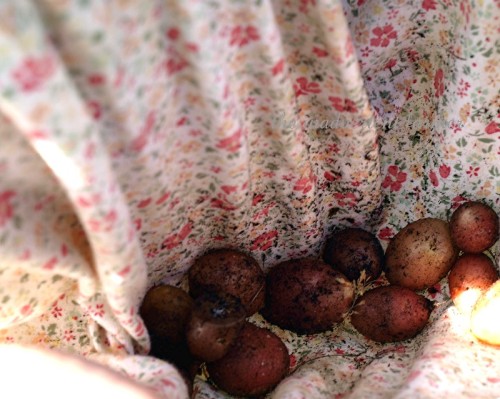
WhooHoo…we harvested our first potatoes!

We tipped over one of our potato barrels and one smaller pot…and had so much fun doing it!

potato1

I haven’t grown potatoes in years and never before in barrels…it worked very well indeed!

potato2

There was no worry about cutting into the potatoes with a shovel as your dug up the hills…

potato4

All we had to do was search through the soil that was dumped in a heap…

potato3

The kids had never dug potatoes before.  When they found the original seed potato all squishy and hollow they called this the ‘mommy potato’ and all the new ones were the ‘baby potatoes’!

I didn’t tell them that the squishy mommy potato was waaayyy to close to the real deal after giving birth to numerous babies…but that is for another post.

potato6

Baby bakers and baby red fingerlings…

potato7

Sweet Girl tenderly carried the smallest of the tators in to make sure no harm came to them!

potato9

She washed them carefully…

potato10

Baby Boy tried…but his arms weren’t quite looong enough

So he was in charge sorting them…

potato8

And most importantly…

potato11

Talking to them!


So in conclusion I highly recommend planting potatoes in barrels, the only drawback that I found was the need for more watering.  But harvesting was such a delight that it far outweighed any negatives.  We took the soil from the barrels and added it to the compost pile and will start with new soil next year to avoid any diseases that might be in it.

We are definitely doing it this way again next year.

potato5

So go out there and get your hands dirty…

Its good for the soul!

Read Full Post »

Older Posts »